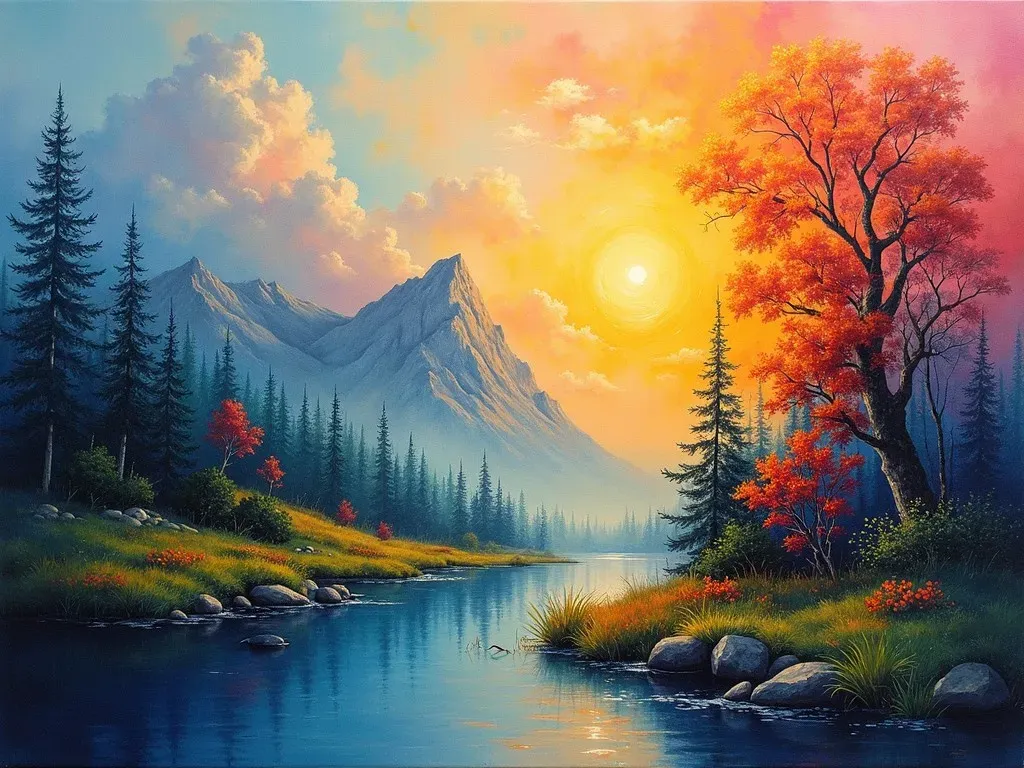
Unleash Your Creativity: Discover the Top Abstract Art Acrylic Painting Techniques

Abstract art acrylic painting techniques allow artists to explore innovative ways to express their emotions and ideas on canvas. This style prioritizes expression over representation, enabling you to create paintings that resonate with your feelings and experiences without the constraints of traditional forms. By understanding and employing various Techniques, both beginners and experienced artists can push the boundaries of their creativity using acrylic paints.

Techniques to Explore

1. Acrylic Wash & Ink

One of the simplest abstract acrylic painting techniques is the acrylic wash paired with ink. This technique involves diluting acrylic paint with water to create a thin, translucent layer. Applying this wash to the canvas can produce soft, ethereal backgrounds. Alternatively, you can use acrylic ink, which can be applied with a dapper for a more controlled distribution of paint.

2. Pouring Technique

The pouring technique has gained popularity for its mesmerizing results. To implement this method, mix acrylic paint with a pouring medium to achieve a fluid consistency. Then, pour the mixture onto the canvas, allowing the colors to flow and blend into one another organically, creating stunning marbled effects.

3. Palette Knife Techniques

Using a palette knife to apply paint can add a rich texture to your artworks. This technique is excellent for creating bold strokes and dynamic patterns, as the knife allows for more precise control of paint application compared to brushes. You can also scrape the surface to reveal underlying layers, adding depth to your piece.

Facts in Table Format:

Technique Description
Acrylic Wash & Ink Thin, translucent layers using diluted paint or ink
Pouring Technique Fluid colors that blend naturally on the canvas
Palette Knife Techniques Bold textures and patterns created with a palette knife

4. Stamping & Printing

Incorporating everyday objects and tools as stamps can enhance the visual appeal of your acrylic painting. Utilize sponges, bubble wrap, or even leaves to create unique prints on your canvas. This technique adds a layer of complexity and invites a playful and experimental atmosphere in your creations.

5. Splattering

This technique is about freedom and spontaneity. Take a brush or other tools to splatter paint across the canvas, allowing for random dot patterns. It can create a playful feel and introduce vibrant color specks into your abstract art. Experiment with different paint consistencies to achieve varied effects.

6. Dry Brushing

Using a dry brush with minimal paint can create a delicate, textured look. This technique is perfect for layering transparent colors to build a sense of depth. The interplay of colors becomes crucial as you gently drag a brush across the surface, revealing both the paint and canvas beneath.

7. Layering

Layering is integral to achieving depth and complexity in abstract acrylic paintings. Build your artwork gradually by applying multiple layers of paint, allowing each layer to dry before adding the next. This technique enables you to create intriguing effects by showcasing the interaction of colors and textures.

More Techniques in a List Format:

  • Sgraffito: Scratching into wet paint to create texture or lines
  • Masking Tape: Using tape to create sharp lines and shapes
  • Glazing: Applying a thin transparent layer of color over dried paint to modify the tone

Tools and Materials

Using the right tools enhances your painting experience and outcomes. Here’s a list of essential tools for abstract acrylic painting:

Essential Tools

  • Acrylic Paints: A range of colors including soft and vibrant hues
  • Acrylic Mediums: Pouring medium, gel medium, and texture gel
  • Paintbrushes: Various sizes and shapes for different effects
  • Palette Knives: For spreading and adding texture
  • Sponges and Rags: For blotting, dabbing, and creating textures

Suggested Surface Options

  • Stretched Canvas
  • Wood Panels
  • Heavyweight Paper

Statistics on Abstract Art Appreciation:

  • 30% of new art collectors prefer abstract art styles.
  • 45% of artists state that acrylics are their preferred medium.

Color Theory for Abstract Painting

Understanding color theory enhances your ability to convey emotions through your artwork. The combination and contrast of colors can create distinct atmospheres in your painting.

  • Warm Colors (Red, Yellow, Orange) evoke feelings of warmth, energy, and passion.
  • Cool Colors (Blue, Green, Purple) can express calmness, peace, and tranquility.
  • Neutral Colors (Black, White, Gray) can balance compositions and offer subtle shifts in tone.

Frequently Asked Questions (FAQs)

Q1: What type of acrylic paint is best for abstract painting?

A1: Look for high-quality artist-grade acrylics, which offer vibrant pigments and excellent coverage. You can also experiment with fluid acrylics for unique effects.

Q2: How can I create depth in my abstract art?

A2: Utilize layering techniques, contrasting colors, and varying brush strokes to build depth in your artwork.

Q3: Are there any preparation steps before starting an acrylic abstract painting?

A3: It’s beneficial to have a planned concept, gather your materials, and experiment with color combinations before starting. Priming your canvas can also help paint adhere better.

Q4: Can I use house paint for abstract art?

A4: While it’s possible, house paint may not provide the same quality and vibrancy as artist-grade acrylics. For best results, stick with art-specific products.

Q5: Where can I find inspiration for abstract painting?

A5: Explore art galleries, online platforms, like the Artists Network, art forums, and social media platforms dedicated to abstract art.

Image Placeholder – Example Art Piece

By exploring the diverse world of abstract acrylic painting techniques, artists at any skill level can create captivating works of art that showcase their unique visions. The beauty of abstract art lies in its ability to transcend realism and focus on emotional expression, enabling individuals to leave their mark on canvas creatively. So grab your Supplies, dive into your artistic journey, and let your imagination run wild!

Unlock Your Inner Artist: A Comprehensive Guide to Oil Painting for Beginners!

Oil painting is a painting method involving the procedure of painting with pigments and using drying oil as the binder. For centuries, it has been the preferred technique for creating artistic works on surfaces like canvas, wood panels, or copper. This guide will give you everything you need to know about oil painting, with tips and resources designed specifically for beginners!

Understanding Oil Painting

Oil paint is a medium comprised of colored pigments combined with a drying oil, which acts as a binding agent. The unique properties of oil paint allow for greater flexibility, richer colors, and a diversity of applications, making it a favorite among many famous artists throughout history. A few notable aspects of oil painting include:

  • Drying Time: Oil paints take a longer time to dry compared to acrylics, allowing artists to blend and manipulate the paint for extended periods.
  • Color Depth: Oil paints generally offer a richer color saturation and a wide range of mixing possibilities.

Key Components

Before diving into Techniques, it’s essential to familiarize yourself with the materials and tools available for oil painting.

Essential Supplies for Oil Painting:

Item Description
Oil Paints Available in tubes or jars, with various colors.
Brushes Different shapes and sizes like flats, rounds, and filbert.
Canvas Pre-stretched canvases or canvas boards.
Palette Used for mixing colors; can be wooden or glass.
Palette Knives Useful for mixing paints and applying texture.
Mediums To alter the viscosity and drying time of the paint (linseed oil, turpentine, etc.).
Rags/Towels For cleaning brushes and wiping your hands.
Easel To hold your canvas at a comfortable angle.

Facts, Figures, and Resources

  1. Popularity of Oil Painting: Oil painting has found a resurgence in popularity in recent years, especially among hobbyists and art students. According to a 2020 Arts Education survey, 45% of art students preferred oil painting over other mediums.

  2. History: The use of oil-based pigments dates back to the 7th century. However, its widespread adoption is primarily credited to the Northern Renaissance artists, such as Jan van Eyck.

  3. Artists: Renowned oil painters include Leonardo da Vinci, Vincent van Gogh, claude monet, and more contemporary figures like Gerhard Richter.

For a more in-depth guide on getting started with oil painting, visit Draw Paint Academy.

Basic Techniques for Beginners

1. Color Mixing

Understanding how to mix colors will be vital to your oil painting journey. Experiment with primary colors (red, blue, yellow) to create secondary colors (green, orange, purple). Here’s a simple color mixing guide:

Primary Color Mixed With Resulting Color
Red Yellow Orange
Yellow Blue Green
Blue Red Purple

2. Brush Techniques

In oil painting, different brush techniques will yield various effects. Here are some common ones you should try:

  • Dry Brush: Using a small amount of paint, create textured effects and fine details.
  • Scumbling: For a hazy effect, lightly drag a dry brush over dry paint.
  • Glazing: This involves applying thin, transparent layers of paint to give depth to colors.

3. Layering and Impasto

Oil paint can be layered, which helps in building texture and depth. Impasto is a technique where paint is applied very thickly, often creating a three-dimensional effect on the canvas.

Common Challenges and Solutions

The Fat Over Lean Rule

One common pitfall is the “fat over lean” rule in oil painting. This means that each additional layer of paint should contain more oil than the layer beneath it. This will help prevent cracking as layers dry at different rates.

Drying Times

Working with oil paints can be frustrating due to the long drying times. To speed up drying, you can use fast-drying mediums like alkyd oil, which will affect the paint’s texture and flow. Experiment to find a balance that works for you.

FAQs About Oil Painting

Q: Can I use regular paintbrushes for oil painting?

A: While you can use regular brushes, it’s advisable to use those made specifically for oil painting. These brushes are designed to withstand the thick, oily nature of oil paints.

Q: How do I clean my oil painting brushes?

A: Clean brushes with a combination of mineral spirits or turpentine followed by soap and water. Always rinse thoroughly to avoid residue.

Q: Can I paint with oils without solvents?

A: Yes! There are water-mixable oil paints that you can use, allowing artists to work without traditional solvents.

Q: What are some beginner oil painting projects I can try?

A: Beginners can start with still life setups, landscapes, or simple abstract compositions to allow experimentation with color and texture.

Conclusion

With the right tools, techniques, and a willingness to experiment, oil painting can become a fulfilling hobby or even a professional pursuit. Embrace your creativity, let your imagination flow, and who knows? Perhaps you’ll be the next master of oil painting!

For more in-depth techniques and guidance, refer to the full resource available at Britannica.

Happy Painting!


Does Bob Ross Paint with Oil or Acrylic? Discover the Truth Behind His Masterpieces!

When it comes to the art of painting, one name stands out prominently: Bob Ross. Known for his soothing voice, gentle demeanor, and iconic style, Bob Ross has captured the hearts of millions while teaching them the joys of painting. So, does Bob Ross paint with oil or acrylic? The answer is simple: Bob Ross primarily used oil paints in his artwork.

Oil vs. Acrylic: Understanding Bob Ross’s Choice

The choice of paint significantly affects the outcome of any painting. Bob Ross favored oil paints due to their unique properties, allowing for better blending and a more vibrant finish. Here is a comparison table that outlines the differences between oil and acrylic paints in general, which helps to appreciate the context of Bob Ross’s choice:

Feature Oil Paints Acrylic Paints
Drying Time Slow (days to weeks) Fast (minutes to hours)
Texture Creamy and smooth Thick and plastic-like
Color Vibrancy Rich and deep Can appear more vibrant when dry
Blending Excellent for smooth transitions Requires quick work to blend
Clean-Up Requires solvents like turpentine Simple clean-up with water
Layering Technique Can be glazed for depth Layers dry quickly, making glazing tricky

Bob Ross’s Painting Technique

Bob Ross was a master of the wet-on-wet technique, also known as "alla prima." This method allows artists to touch wet paint directly onto wet paint, which enhances blending and offers a mastery over textures that is particularly effective with oil paints. For those interested in trying Bob Ross’s style, here’s what you need to know about the tools and materials he used:

  1. Oil Paints: Bob preferred specially formulated oil paints designed for the wet-on-wet technique.
  2. Brushes: He used a variety of brushes including fan brushes and round brushes, which contributed to the creation of clouds, trees, and other textures.
  3. Canvas Size: Bob Ross typically painted on an 18 x 24-inch canvas, which provided ample space for his landscapes.

Adapting Bob Ross’s Techniques with Acrylics

Although Bob Ross primarily used oil paints, many artists have successfully adapted his Techniques for use with acrylic paints. It is important to note that acrylic paint dries faster than oils, which can create challenges when trying to blend colors. Here are some tips for using acrylics in a Bob Ross style:

  • Work Quickly: Due to their fast drying times, you must act swiftly to achieve the desired effects.
  • Use a Retarder: Adding a retarder to your acrylic mixture can extend the drying time, allowing for more blending time and depth.
  • Misting: A light mist of water can help keep acrylic paints workable, although caution should be taken not to overdo it.

You can find various tutorials online that guide you through the process of painting in Bob Ross’s style using acrylics. For example, articles like “Can You Paint Bob Ross Style With Acrylics?” from Sustain The Art provide insights on how to successfully navigate these adjustments.

Frequently Asked Questions (FAQ)

Q: Can I paint like Bob Ross with acrylic paints?

A: Yes, you can adapt Bob Ross’s techniques to use acrylic paints, but be mindful of their fast drying time.

Q: What size canvas did Bob Ross use?

A: Bob Ross typically painted on an 18 x 24-inch canvas.

Q: Is the Bob Ross technique compatible with acrylics?

A: While Bob Ross primarily used oils, his wet-on-wet technique can be used with acrylics; just remember to adjust for the different drying times.

Q: Which paints are best for beginners wanting to follow Bob Ross’s style?

A: For beginners, a set of quality oil paints or student-grade acrylics can be used. Choose according to your comfort level and willingness to manage drying times.

Exploring Bob Ross’s Legacy

Bob Ross’s contributions to the world of art extend well beyond his choice of paints. He has inspired countless people to take up painting, embracing creativity and self-expression. His unique approach cultivated a sense of calm and serenity, encouraging viewers to discover and enhance their own artistic abilities. The accessibility of his teachings is celebrated not just for the techniques he employed, but for the philosophy he promoted.

Fun Fact: Bob Ross was a sergeant in the United States Air Force and didn’t start painting until he was in his thirties! His journey is a testament to the idea that it’s never too late to pursue your passion.

Conclusion: The Lasting Impact

Bob Ross’s legacy as a painter stretches far beyond his choice of oil paints. By imparting joy and well-being through art, he has become a cultural icon. Whether you choose oils or acrylics, the essence of Bob Ross’s painting lies in the enjoyment of the process and the encouragement to embrace your artistic voice.

For those interested in pursuing either oil painting or acrylics in Bob Ross’s style, there are myriad resources available, including online tutorials, books, and community studios. For more detailed insights on practicing in his style, you can check out the Bob Ross Foundation for a wealth of information and techniques.

Do You Use Water with Oil Paint? Exploring the Truth Behind Water-Mixable Oil Paints

When it comes to oil painting, a common question arises: "Do you use water with oil paint?" While traditional oil paints typically require solvents like turpentine for thinning and cleanup, advancements in art supplies have introduced water-mixable oil paints that challenge this norm.

The Reality of Mixing Water with Oil Paint

To understand the implications of using water with oil paints, we first need to explore the differences between traditional oil paints and the newer water-mixable varieties. Traditional oil paints are created with pigments suspended in oils such as linseed or safflower. These paints require solvents for thinning and cleaning, which can pose health risks due to fumes and necessary ventilation. On the other hand, water-mixable oil paints have been specially formulated to dissolve in water, providing a safer and more user-friendly option.

Fact and Figures

Characteristic Traditional Oil Paints Water-Mixable Oil Paints
Solvent Requirement Yes (typically turpentine or mineral spirits) No; clean up with water
Viscosity Thick Thinnable with water
Drying Time Longer (days to weeks) Moderate (days)
Fumes Generated Yes Minimal
Ease of Cleanup Complicated Easy

Benefits of Water-Mixable Oil Paints

There are several advantages to utilizing water-mixable oil paints, making them an attractive choice for aspiring and professional artists alike:

  1. Healthier Environment: The absence of harsh solvents leads to a healthier studio environment, particularly for those sensitive to chemicals.
  2. Versatility: Artists can use water as a medium for both thinning and cleaning brushes, allowing for greater flexibility during the painting process.
  3. Less Mess: Water cleanup means no more dealing with the complicated disposal of solvents, making it easier to maintain a clean workspace.
  4. Layering Ability: Water-mixable oils can be used in a layering technique, similar to traditional oils, resulting in beautiful, textured paintings.

Table: Comparison of Cleanup Methods

Cleanup Method Traditional Oil Paints Water-Mixable Oil Paints
Brushes Use solvents Use water
Paint Palettes Solvent to clean Rinse with water
Canvas Requires scraping for oils Water-soluble for mild wash
Skin Harsh scrubbing needed Soap and water

Common Misconceptions

Despite the increasing popularity of water-mixable oil paints, misconceptions continue to surround their usage.

Can You Use Water with Regular Oil Paints?

No, using water to clean or thin traditional oil paints is not advisable. The mixture can cause the paint to seize and alter its properties, resulting in an undesirable finish. If you wish to use oil paints without hazardous solvents, opting for water-mixable variants is the solution.

Tips for Using Water-Mixable Oil Paints

  1. Experiment with Ratios: Learning how much water to add to achieve desired fluidity while maintaining pigment integrity.
  2. Blend Wisely: Use water sparingly, as too much can make the paint lose its richness; consider using mediums designed for water-mixable oils.
  3. Brush Technique: Use brushes similar to traditional oil brushes, but be aware they may need to be cleaned differently.
  4. Layering: Allow thin layers to dry completely before adding new ones for the best results.

oil painting Techniques">

Frequently Asked Questions (FAQs)

Can You Use Water with Oil Paints?

No, traditional oil paints should not be mixed with water as it can disrupt the paint’s integrity.

What Are Water-Mixable Oil Paints?

These are specially formulated oil paints that can be thinned and cleaned up using water instead of solvents.

Are Water-Mixable Oil Paints a Good Alternative?

Yes, they are an excellent alternative for those looking for a safer and simpler painting experience.

How Do You Clean Up After Using Water-Mixable Oil Paints?

Simply rinse your brushes and tools with water, making cleanup much quicker than with traditional oil paints.

Do Water-Mixable Oil Paints Dry Faster?

While they don’t dry as quickly as acrylic paints, water-mixable oils tend to have a moderate drying time that is shorter compared to traditional oils.

Conclusion Thoughts

The exploring of water-mixable oil paints marks an exciting new chapter in the artistic community, providing options that empower artists to create without compromising their health or cleanliness. With their benefits clearly outlined, artists might consider transitioning from traditional methods to these innovative paints, enhancing both their work and their painting environments.

For more in-depth information about using water-mixable oils, you can refer to Fine Art Tutorials.

By embracing this new technology, painters can continue to develop their skills and explore new horizons in their artistic journey.

Exit mobile version