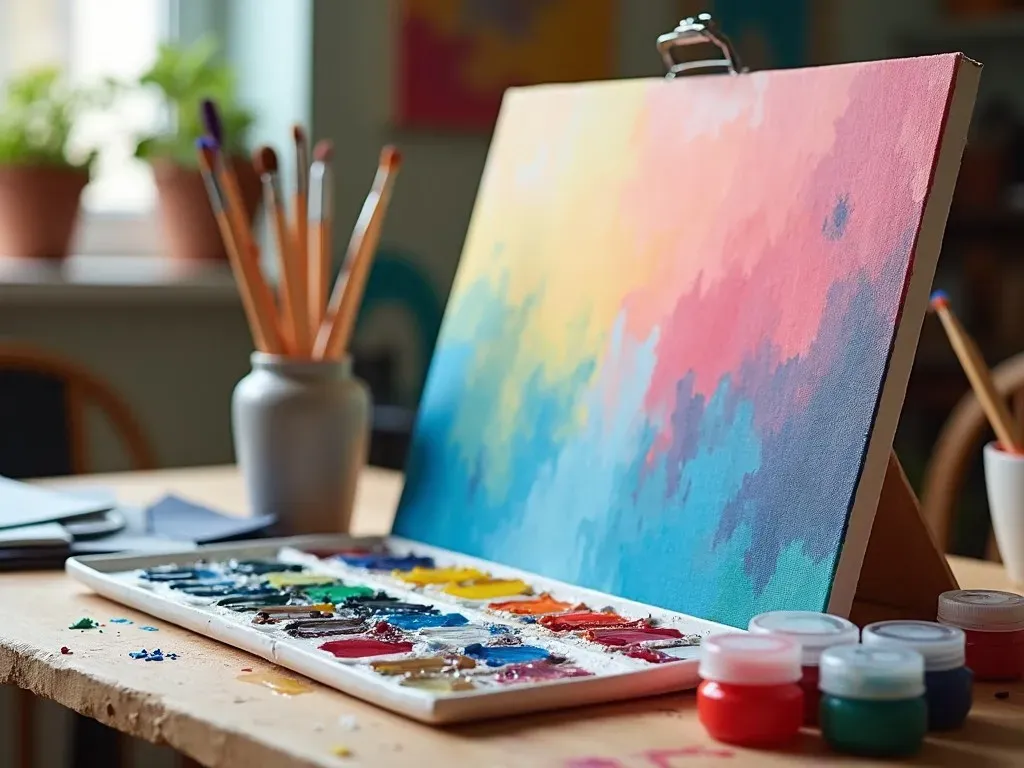
Captivating Scenes: The Art of Painting a River

Painting of a river captures the essence of nature and serenity, showcasing the flowing waters alongside lush landscapes. The beauty of rivers in artwork has inspired countless artists through the ages, leading to stunning depictions that evoke feelings of calm and wonder. From historical masterpieces to contemporary interpretations, artwork featuring rivers allows viewers to escape into tranquil worlds.

The Historical Significance of River Paintings

Rivers have been a pivotal subject in art history, representing life, movement, and reflection. Throughout art movements—from the Romanticism of J.M.W. Turner to impressionistic interpretations by claude monet—rivers have been woven into the fabric of countless masterpieces.

Famous River Paintings & Their Artists:

Painting Title Artist Year Style
The Fighting Temeraire J.M.W. Turner 1839 Romanticism
La Grenouillère Pierre-Auguste Renoir 1869 Impressionism
A River Landscape Leonardo da Vinci 1511-13 Renaissance
The Oxbow Thomas Cole 1836 Hudson River School
Water Lilies Claude Monet 1916 Impressionism

The significance of rivers can also be seen in their symbolism, often reflecting emotions and environments ranging from peaceful to turbulent. Artists like John Frederick Kensett, known for his luminous landscapes featuring rivers, helped to shape the American art scene by portraying nature in an inspiring and contemplative manner.

Techniques in Painting Rivers: A Guide

When delving into the creation of a river oil painting, it’s important to master several key Techniques. Whether choosing oil, acrylic, or watercolor, here are essential tips for capturing the natural beauty of a river:

  1. Color Palette: Use a variety of blues, greens, and earthy shades. Rivers reflect the sky and surrounding foliage, so blend soft pastels to dark hues for depth.
  2. Brushstrokes: Apply fluid brushstrokes that mimic the flow of water. This creates a sense of motion, which is crucial in portraying rivers realistically.
  3. Layering: Implement layering techniques; start with base colors and gradually build with highlights and shadows to add dimension.
  4. Reflection: Focus on depicting reflections accurately by mirroring shapes and colors of nearby objects on the water surface.
  5. Details: Add elements like rocks, foliage, and banks to enrich the overall composition. This enhances the scene’s realism and depth.

The Environmental Impact of Rivers in Art

Rivers serve as a reminder of the importance of conservation and the fragility of ecosystems. Artists today often convey messages surrounding environmental issues through river depictions. For instance, rivers may illustrate the effects of pollution or climate change, linking artistic expression with advocacy for nature.

Notable Modern River Artists

  1. David Hockney: Renowned for his bright, colorful landscapes, Hockney’s river paintings reflect both realism and abstraction.
  2. Julie Heffernan: Heffernan integrates rivers into fantastical landscapes that engage with themes of nature and humanity’s impact on the environment.
  3. Liu Dan: His ink paintings often feature rivers symbolically, merging tradition with a modern narrative of nature’s relevance.

Tips for Creating Your River Oil Painting

Creating a painting of a river requires both technique and sentiment. Here are additional tips for amateur and seasoned artists alike:

  • Sketch Your Composition: Before applying any paint, sketch the outline with light pencil strokes to establish the flow and layout of the river within your artwork.

  • Study Real Landscapes: Spend time observing rivers in person or through high-quality images to understand their colors, reflections, and textures.

  • Experiment with Mediums: While oil paints are fantastic, don’t hesitate to explore acrylics or watercolors. Each medium will offer a different feel and technique for depicting water.

  • Utilize Tutorials: A plethora of online resources and tutorials are available that can guide you through specific painting techniques. Websites like MightyPaint offer detailed guides on creating realistic river water effects.

FAQ Section

Q1: What materials do I need to start painting a river?
A1: You’ll need your choice of paint medium (oil, acrylic, or watercolor), brushes in various sizes, a palette, canvas or paper, and an easel.

Q2: How do I choose the right colors for my river painting?
A2: Look at real-life examples and consider the time of day—morning light has softer hues, while sunset can create vibrant colors reflecting on water.

Q3: Can I use photographs for reference in my river painting?
A3: Absolutely! Photographs can be very useful, but it’s essential to interpret them creatively rather than replicating them blindly.

Q4: What’s the most challenging aspect of painting rivers?
A4: Capturing the movement and essence of water can be complex due to the reflections and light interplay—practice is key to mastering this.

Influences in Art: Rivers Beyond Painting

The cultural significance of rivers extends beyond painting into literature, music, and photography, highlighting their multifunctionality as symbols, settings, and subjects. Many renowned authors, such as Mark Twain and Ernest Hemingway, have utilized rivers in their narratives, adding depth to their explorations of human experience.

In modern times, river-centric art and activism intersect as artists use their talents to raise awareness about climate issues related to water bodies. This provides a unique platform for advocacy while celebrating the beauty of rivers.

The exploration of rivers in art continues to evolve, showcasing humanity’s intricate relationship with these flowing arteries of life. Through vibrant oil paintings and tranquil watercolors, artists not only illustrate nature’s grandeur but also invite viewers to reflect on their own connection to the ever-flowing rivers around them.

Mastering Acrylic Painting: Top Tips for Beginners to Unlock Your Creative Potential

Acrylic painting is a versatile and accessible medium that allows artists of all levels to explore their creativity. Whether you’re a complete novice or looking to refine your skills, this article provides essential acrylic painting tips that will help you on your creative journey.

Understanding Acrylic Paint

Acrylic paint is a fast-drying paint made of pigment suspended in acrylic polymer emulsion. One of its most attractive features is its versatility; it can be thinned with water, used straight from the tube, or mixed with various mediums to create different effects. The paint is non-toxic and dries quickly, which makes it ideal for beginners looking to experiment without long waiting periods.

Key Characteristics of Acrylic Paint

Feature Description
Drying Time Fast-drying
Water Soluble Can be thinned and cleaned with water
Versatility Can mimic watercolors or oil paints
Finish Dries to a flexible, water-resistant finish
Toxicity Non-toxic, suitable for beginners

Essential Tools and Supplies

Having the right tools is crucial when starting your acrylic painting journey. Here’s a list of fundamental Supplies you’ll need:

  • Acrylic Paints (varied colors)
  • Brushes (synthetic brushes are ideal)
  • Palette (for mixing colors)
  • Canvas or acrylic paper
  • Water container (for rinsing brushes)
  • Rags or paper towels
  • Palette knife (for mixing and applying paint)

Reference Video

Acrylic Painting Tips for Beginners

1. Start with a Limited Color Palette

Using a limited palette of primary colors (red, blue, yellow) along with black and white will help you understand color mixing without getting overwhelmed by choices. Mixing colors from these basic hues will give you a broader range with fewer paints.

2. Master Color Mixing

It’s essential to learn how to mix colors effectively. Begin by creating a color wheel. This will help you understand complementary colors and how they interact on the canvas.

3. Work on Different Surfaces

The beauty of acrylics is that they can be painted on various surfaces—canvas, wood, and even glass. Experiment with different textures to find what works for your style.

4. Use the Right Brush Techniques

Invest in different types of brushes, such as flat, round, and filbert. Each type offers different effects:

  • Flat Brushes: Ideal for broad strokes and washes.
  • Round Brushes: Great for detail work and lines.
  • Filbert Brushes: Versatile for blending and shaping.

Familiarize yourself with brush strokes like stippling, dry brushing, and washes to expand your repertoire.

Brush Type Usage
Flat Broad strokes, washes
Round Detail work, outlines
Filbert Blending, creating shapes

5. Experiment with Water and Mediums

Acrylic paints respond well to water, meaning you can adjust the consistency based on your technique. Adding water can help create watercolor-like washes, whereas acrylic mediums can enhance texture or drying times.

6. Layer Your Paint Wisely

Acrylics dry quickly, allowing you to build layers without waiting long. However, ensure that each layer is dry before applying the next. This technique can create depth and richness in your artwork.

Advanced acrylic painting techniques

7. Incorporate Mixed Media

Mixing acrylics with other materials like pastels, charcoal, or collage elements can create exciting textures and effects. Experiment with layering and applying various materials to create unique artwork.

8. Use Glazing Techniques

Glazing involves applying thin layers of transparent paint over dried layers. This can create luminous effects and depth. Use glazing mediums to thin your paint and achieve the desired transparency.

9. Try Impasto for Textures

Impasto is a technique where paint is applied thickly, creating texture on the canvas. Use palette knives or thick brushes to build up layers of paint that retain brush or knife strokes.

10. Keep Your Work Area Organized

A cluttered workspace can hamper creativity. Ensure that all your tools, paints, and canvases are organized and within reach to keep your focus on painting.

Frequently Asked Questions (FAQ)

Q1: How do I clean my brushes after using acrylic paint?

A: Rinse your brushes in water immediately after use. If the paint has dried, try soaking them in warm water for a short while before gently washing.

Q2: Can I use acrylic paint on paper?

A: Yes! Acrylic paint is great on paper, but choosing a heavier paper or canvas paper designed specifically for acrylic use is advisable to prevent warping.

Q3: What should I do if my paint dries too quickly?

A: Consider using a stay-wet palette, which helps keep your paint moist for longer periods. You can also add a slow-drying medium to your paint to extend its working time.

Q4: How do I store my acrylic paintings?

A: Always store your paintings in a dry, flat place. If they need to be stacked, place a protective layer (like a cloth or paper) between them to avoid any potential damage.

Q5: Where can I find additional resources on acrylic painting techniques?

A: Many online platforms provide helpful tutorials. A few recommended websites for further exploration are:

In Summary

Acrylic painting offers infinite possibilities for expression and creativity. By applying these acrylic painting tips, experimenting with different Techniques, and practicing regularly, you’ll develop your unique style, making the journey more enjoyable and fulfilling. Embrace your art, and let each stroke on the canvas tell your story!

Unveiling the Magic: Why Linseed Oil for Paint is a Game-Changer for Artists!

Linseed oil for paint is a crucial element in the world of oil painting. This natural substance, derived from flax seeds, is not just a medium but an essential component that affects the overall quality, texture, and durability of the paint.

What is Linseed Oil Used For in Oil Painting?

Linseed oil has a multi-faceted role in oil painting. Primarily, it serves as a binder that holds the pigments together, allowing for even dispersion and consistency in color application. Additionally, it modifies the texture of the paint, making it smoother and easier to work with.

Function Description
Binder Holds pigments together, maintaining color integrity.
Medium Alters the texture and viscosity, allowing for varied Techniques.
Drying Agent Enables slower drying for detailed layering and blending.

How Linseed Oil Enhances Oil Paint

Linseed oil plays several roles in enhancing oil paint, including:

  1. Improved Pigment Dispersion: It helps in achieving uniform color distribution in the paint mixture, preventing clumping.
  2. Flexibility: This oil adds flexibility to dried paint, reducing the likelihood of cracking or peeling.
  3. Gloss Finish: Linseed oil contributes to a natural gloss, enriching the vibrancy of the colors.
  4. Slow Drying Time: Artists often value linseed oil for its ability to slow down the drying process, which is ideal for techniques requiring blending and glazing.

The Science Behind Linseed Oil

Linseed oil is composed of fatty acids that undergo chemical reactions upon exposure to air. This process, known as oxidation, transforms liquid linseed oil into a solid, durable film through cross-linking. Here’s a breakdown of its components:

Component Function
Alpha-Linolenic Acid Provides flexibility and durability.
Linoleic Acid Contributes to the drying properties.
Oleic Acid Enhances flow and application.

Common Uses of Linseed Oil in Oil Painting

In the realm of oil painting, linseed oil is utilized for several purposes:

  • Mixing with Pigments: Artists mix different pigments with linseed oil to create unique shades and effects.
  • Creating Glazes: By diluting the oil, artists can create transparent layers that add depth to their work.
  • Varnishing: Once the paint dries, linseed oil can be used in varnishing to enhance the durability and appearance of the finished artwork.

oil painting techniques">

The Benefits of Using Linseed Oil for Paint

1. Easy Application

Linseed oil allows for smoother application on various surfaces, be it canvas, wood, or metal. The consistency and flow it imparts make it a favorite among artists.

2. Eco-Friendly Option

Derived from flax seeds, linseed oil is a natural product with low toxicity levels. For environmentally-conscious artists, it serves as an excellent alternative to synthetic mediums.

3. Versatility

From traditional oil painting to modern artistic expressions, linseed oil can adapt to diverse techniques, making it suitable for artists of all styles.

4. Historical Significance

Linseed oil has been a trusted medium since the 12th century, representing a long-standing tradition in the art world. This rich history adds cultural depth to its use.

Reference Video

FAQ About Linseed Oil for Paint

Q: What does linseed oil do to oil paint?
A: Linseed oil acts as a binder, enhances flow, and extends drying time, allowing for better blending and layering.

Q: How does linseed oil affect drying times?
A: Linseed oil slows down the drying process, which can be beneficial for artists who need extra time for adjustments or detailed work.

Q: Can linseed oil be used with other mediums?
A: Yes, many artists combine linseed oil with turpentine or mineral spirits to achieve desired textures and effects.

Q: Is linseed oil safe to use?
A: Generally, linseed oil is considered safe, but precautions should be taken to avoid ingestion or prolonged skin exposure.

Q: How do I clean brushes after using linseed oil?
A: Brushes can be cleaned using mineral spirits or soap and water, making sure to remove all excess oil for proper maintenance.

Comparing Linseed Oil with Other Mediums

Medium Drying Time Flexibility Finish
Linseed Oil Slower drying Highly flexible Glossy
Turpentine Faster drying Less flexible Matte
Safflower Oil Medium drying Moderately flexible Semi-gloss
Poppy Oil Slower drying Flexible Satin

Painting Techniques with Linseed Oil

Artists often utilize linseed oil for various techniques:

  • Glazing: Applying layers of translucent paint to create depth.
  • Impasto: Using thick layers of paint for a three-dimensional effect.
  • Scumbling: Rubbing a thin layer of opaque paint over a dried layer for texture.

Conclusion

Using linseed oil for paint unlocks a myriad of possibilities for artists, enhancing the quality of their work while offering a connection to traditional practices. For more detailed insights into linseed oil and oil painting, you can visit The Beginning Artist.

Embracing linseed oil not only enriches the artist’s toolkit but also fosters a deeper appreciation for the art of oil painting itself. Whether you are a novice or a seasoned professional, understanding the implications and advantages of this remarkable medium is essential for any creative endeavor.

Discover the Top 7 Art Painting Styles That Will Ignite Your Creativity!

Art painting styles refer to the various methods and Techniques artists use to express themselves through the medium of paint. These styles are not only defining features of specific artworks but also serve as cultural reflections of their time. In this article, we delve into the popular art painting styles that have shaped the art world, exploring their unique characteristics and historical significance.

A Comprehensive Painting Styles List

When discussing art painting styles, it’s essential to acknowledge the breadth of expression found in this medium. Here’s a brief overview of the 7 most popular painting styles:

  1. Realism
  2. Impressionism
  3. Post-Impressionism
  4. Expressionism
  5. Abstract
  6. Surrealism
  7. Cubism

Let’s break down each of these styles to understand their unique contributions to art.

1. Realism

Realism emerged in the mid-19th century as a reaction against Romanticism. This style focuses on depicting subjects as they are in real life, aiming for functionality and accurate representation. Artists sought to reflect everyday experiences and social realities.

  • Notable Artists: Gustave Courbet, Jean-François Millet
  • Examples: “The Stone Breakers” by Courbet

2. Impressionism

Originating in France during the 19th century, Impressionism revolutionized the art scene by emphasizing the effects of light and color. Artists painted landscapes and scenes of everyday life, often working outdoors (en plein air). This style is characterized by visible brush strokes and a focus on capturing the momentary effects of light.

  • Notable Artists: claude monet, Edgar Degas
  • Examples: “Impression, Sunrise” by Monet

3. Post-Impressionism

Post-Impressionism developed from Impressionism but began to emphasize more symbolic content and formal structure. Artists in this movement sought to extend Impressionism while introducing new perspectives and techniques.

  • Notable Artists: Vincent van Gogh, Paul Cézanne
  • Examples: “Starry Night” by van Gogh

4. Expressionism

Expressionism emerged in the early 20th century, focusing on representing emotional experiences rather than physical reality. Artists sought to convey deep feelings through distortion, exaggeration, and bold colors.

  • Notable Artists: Edvard Munch, Wassily Kandinsky
  • Examples: “The Scream” by Munch

5. Abstract

Abstract art takes on a form that does not aim to represent external reality. Instead, it uses shapes, colors, and forms to achieve its effect, allowing viewers to interpret the art in personal ways, pursuing emotional and conceptual depth.

  • Notable Artists: Piet Mondrian, Jackson Pollock
  • Examples: “Composition II in Red, Blue, and Yellow” by Mondrian

6. Surrealism

Surrealism emerged in the 1920s, combining dreamlike scenes and bizarre, illogical images to unlock the unconscious mind. Artists sought to challenge perceptions of reality and explore the strange and fantastical.

  • Notable Artists: Salvador Dalí, René Magritte
  • Examples: “The Persistence of Memory” by Dalí

7. Cubism

Developed in the early 20th century, Cubism is characterized by fragmented objects and subjects presented from multiple viewpoints. This movement redefined how objects could be perceived on a flat surface.

  • Notable Artists: Pablo Picasso, Georges Braque
  • Examples: “Les Demoiselles d’Avignon” by Picasso

Art Painting Styles by Techniques

Various techniques differentiate these painting styles. Here’s a list of key painting techniques that complement the styles mentioned above:

Technique Description
Oil Painting Using oil-based paints, known for rich colors and blending abilities.
Watercolor Utilizes water-based paints, offering a translucent quality.
Acrylic Painting Fast-drying paint that can mimic both oil and watercolor effects.
Gouache Opaque water-based paint, ideal for vibrant colors.
Encaustic Involves using heated wax to create texture and depth.

Key Facts and Figures

  • Number of Art Movements: Over 40 major art movements can be traced throughout art history, each contributing significantly to the evolution of painting styles.
  • Popularity: According to a survey conducted in the art community, Impressionism remains the most favored painting style globally, with a preference score of 35% among art enthusiasts.

Frequently Asked Questions (FAQs)

What is the most recognized art painting style?

Impressionism is often recognized as the most influential and widely celebrated art movement. It introduced many of the techniques and ideas that are foundational to modern art.

How does an artist choose a painting style?

Artists often select a style based on personal preference, the emotions they wish to convey, or the message they want to express in their work. Experimentation plays a significant role in discovering one’s unique artistic voice.

Are there any contemporary movements similar to these styles?

Absolutely! Modern artists frequently draw Inspiration from these historical styles while incorporating contemporary themes and technologies. For example, Eco-Surrealism often blends Surrealism with environmental concerns.

Where can I learn more about different painting styles?

For a deeper dive into various art painting styles, you can refer to StudioBinder’s complete guide to art styles.

Art painting styles reflect humanity’s creative spirit, offering insights into culture, emotion, and the passage of time. Each style carries a legacy that inspires both artists and audiences, creating an enduring dialogue through visual imagery. Whether you are an artist or an art lover, understanding these styles deepens appreciation for the richness of artistic expression.

Unlock Your Creativity with Oil Painting Still Life: A Comprehensive Guide to Master this Timeless Art Form

Seed keyword: oil painting still life
Keywords: still life oil


Oil painting still life is a captivating genre of art that focuses on inanimate subjects, typically featuring everyday objects such as fruits, flowers, and household items. This art form allows artists to showcase their technical skills and creativity while providing viewers with a ray of beauty captured in static objects.

Understanding Still Life in Oil Painting

The term still life is derived from the Dutch word "stilleven," which means "quiet life," and it has emerged as a significant genre within the realm of painting. Oil painting still life has a rich history that dates back to ancient civilizations, but it reached new heights during the Renaissance period when artists like Caravaggio and Jan Davidsz de Heem portrayed stunning arrangements that featured an interplay of light and shadow, rich colors, and intricate details.

Characteristics of Oil Painting Still Life

  1. Composition: The arrangement of objects is crucial in still life paintings. A well-composed piece draws the viewer’s eye and encourages them to explore every detail.
  2. Color Palette: Oil paints offer a vast range of colors, which artists exploit to create vibrant and emotive scenes. A limited palette can also be effective for artistic cohesion.
  3. Lighting: Understanding how light interacts with objects adds depth and realism. Artists often use chiaroscuro to accentuate features and create a three-dimensional effect.
  4. Textural Variation: The unique quality of oil paints allows for smooth blending or heavy texture, adding to the overall dynamics of the painting.

Essential Supplies for Oil Painting Still Life

Before you embark on your still life oil painting journey, ensure to gather the following materials:

Material Purpose
Canvas or Panel Surface for painting
Oil Paints Various colors
Brushes Different sizes for detailing
Palette Mixing colors
Palette Knife For mixing paint and creating texture
Rags or Paper Towels For cleaning brushes and hands
Easel To support your canvas
Odorless Solvent For thinning paint and cleaning
Varnish To protect your finished painting

Facts and Figures Related to Still Life Painting

  • Historical Significance: The still life genre became prominent during the Renaissance, with Dutch painters leading the way in this depiction of everyday objects.
  • Proportion of Art Sales: Still life paintings represent approximately 15% of total art sales in galleries, indicating a sustained interest from collectors.
  • Global Popularity: While Central and Western European countries are well-known for their still life tradition, contemporary artists worldwide continue to contribute to this genre, adding diverse influences and styles.

Step-by-Step Guide to Creating Oil Painting Still Life

Here’s a simple yet effective step-by-step tutorial to help you create your own still life masterpiece.

Step 1: Choose Your Subject

Select items that inspire you, such as fruits, flowers, or kitchen utensils. Arrange them thoughtfully to create a compelling composition.

Step 2: Prepare Your Canvas

Gesso your canvas to create a smooth surface for painting. Let it dry completely before proceeding.

Step 3: Sketch Your Composition

Lightly sketch the outline of your objects using a pencil or charcoal. Pay attention to proportions and perspective.

Step 4: Underpainting

Begin with an underpainting using a monochromatic color palette. This establishes values (light and dark) and helps in judging colors later.

Step 5: Layering Colors

  1. Base Layer: Start with a base layer of the main colors in your composition.
  2. Add Details: Gradually build up layers, adding highlights and shadows to create depth.
  3. Mixing: Use a palette knife to mix your colors, focusing on harmonious blends.

Step 6: Final Touches

Incorporate textural details and adjust colors as necessary. This is where the painting really comes alive.

Step 7: Drying and Varnishing

Allow your work to dry completely before applying a final varnish layer. This enhances colors and provides protection.

Additional Tips for Success

  • Experiment with Styles: Explore different styles such as realism, impressionism, or abstract to find what resonates with you.
  • Practice Regularly: Like any skill, practice is essential. Set aside time each week to create new still life compositions.
  • Utilize Online Resources: Consider online tutorials and classes such as those available on Art Ignition and YouTube channels dedicated to oil painting.

FAQ

Q: What types of subjects can I use for a still life painting?
A: You can use any inanimate objects, including fruits, flowers, books, and kitchen utensils. The key is to choose items that interest you and can be arranged in an appealing way.

Q: Do I need a lot of experience to create still life paintings?
A: Not at all! Start with simple objects and gradually work your way up to more complex arrangements. Painting is a learning process.

Q: How do I choose my color palette?
A: A limited palette is a good starting point. Select a few primary colors and mix them to create a cohesive look throughout your painting.

Q: How can I improve my skills in oil painting?
A: Regular practice, studying the works of renowned artists, and seeking feedback from fellow artists can greatly enhance your skills.

Q: What is the best way to clean my brushes after oil painting?
A: Use an odorless solvent to clean your brushes thoroughly, ensuring no paint residue remains. Follow up with soap and water for a final cleanse.

With diligence and creativity, you can master the art of oil painting still life. Each painting offers a unique opportunity to express your vision while honing your skills as an artist. Dive in, explore, and enjoy the journey of transforming still objects into vibrant works of art.

Reference Video

Do You Use Water with Oil Paint? Exploring the Truth Behind Water-Mixable Oil Paints

When it comes to oil painting, a common question arises: "Do you use water with oil paint?" While traditional oil paints typically require solvents like turpentine for thinning and cleanup, advancements in art supplies have introduced water-mixable oil paints that challenge this norm.

The Reality of Mixing Water with Oil Paint

To understand the implications of using water with oil paints, we first need to explore the differences between traditional oil paints and the newer water-mixable varieties. Traditional oil paints are created with pigments suspended in oils such as linseed or safflower. These paints require solvents for thinning and cleaning, which can pose health risks due to fumes and necessary ventilation. On the other hand, water-mixable oil paints have been specially formulated to dissolve in water, providing a safer and more user-friendly option.

Fact and Figures

Characteristic Traditional Oil Paints Water-Mixable Oil Paints
Solvent Requirement Yes (typically turpentine or mineral spirits) No; clean up with water
Viscosity Thick Thinnable with water
Drying Time Longer (days to weeks) Moderate (days)
Fumes Generated Yes Minimal
Ease of Cleanup Complicated Easy

Benefits of Water-Mixable Oil Paints

There are several advantages to utilizing water-mixable oil paints, making them an attractive choice for aspiring and professional artists alike:

  1. Healthier Environment: The absence of harsh solvents leads to a healthier studio environment, particularly for those sensitive to chemicals.
  2. Versatility: Artists can use water as a medium for both thinning and cleaning brushes, allowing for greater flexibility during the painting process.
  3. Less Mess: Water cleanup means no more dealing with the complicated disposal of solvents, making it easier to maintain a clean workspace.
  4. Layering Ability: Water-mixable oils can be used in a layering technique, similar to traditional oils, resulting in beautiful, textured paintings.

Table: Comparison of Cleanup Methods

Cleanup Method Traditional Oil Paints Water-Mixable Oil Paints
Brushes Use solvents Use water
Paint Palettes Solvent to clean Rinse with water
Canvas Requires scraping for oils Water-soluble for mild wash
Skin Harsh scrubbing needed Soap and water

Common Misconceptions

Despite the increasing popularity of water-mixable oil paints, misconceptions continue to surround their usage.

Can You Use Water with Regular Oil Paints?

No, using water to clean or thin traditional oil paints is not advisable. The mixture can cause the paint to seize and alter its properties, resulting in an undesirable finish. If you wish to use oil paints without hazardous solvents, opting for water-mixable variants is the solution.

Tips for Using Water-Mixable Oil Paints

  1. Experiment with Ratios: Learning how much water to add to achieve desired fluidity while maintaining pigment integrity.
  2. Blend Wisely: Use water sparingly, as too much can make the paint lose its richness; consider using mediums designed for water-mixable oils.
  3. Brush Technique: Use brushes similar to traditional oil brushes, but be aware they may need to be cleaned differently.
  4. Layering: Allow thin layers to dry completely before adding new ones for the best results.

oil painting Techniques">

Frequently Asked Questions (FAQs)

Can You Use Water with Oil Paints?

No, traditional oil paints should not be mixed with water as it can disrupt the paint’s integrity.

What Are Water-Mixable Oil Paints?

These are specially formulated oil paints that can be thinned and cleaned up using water instead of solvents.

Are Water-Mixable Oil Paints a Good Alternative?

Yes, they are an excellent alternative for those looking for a safer and simpler painting experience.

How Do You Clean Up After Using Water-Mixable Oil Paints?

Simply rinse your brushes and tools with water, making cleanup much quicker than with traditional oil paints.

Do Water-Mixable Oil Paints Dry Faster?

While they don’t dry as quickly as acrylic paints, water-mixable oils tend to have a moderate drying time that is shorter compared to traditional oils.

Conclusion Thoughts

The exploring of water-mixable oil paints marks an exciting new chapter in the artistic community, providing options that empower artists to create without compromising their health or cleanliness. With their benefits clearly outlined, artists might consider transitioning from traditional methods to these innovative paints, enhancing both their work and their painting environments.

For more in-depth information about using water-mixable oils, you can refer to Fine Art Tutorials.

By embracing this new technology, painters can continue to develop their skills and explore new horizons in their artistic journey.

Exit mobile version