Unlock Your Creativity: The Essential Guide to Gesso for Oil Painting!

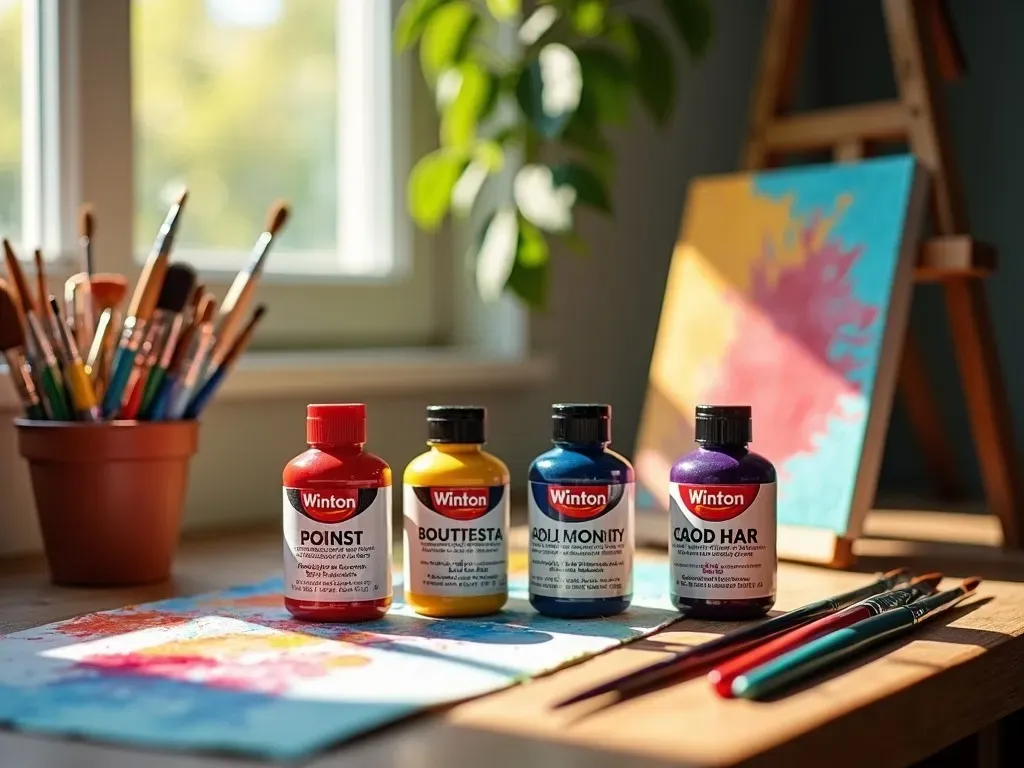
Gesso for oil painting is an indispensable product that every artist should familiarize themselves with when preparing a canvas or board for their next masterpiece.

What Is Gesso and Why Is It Important?

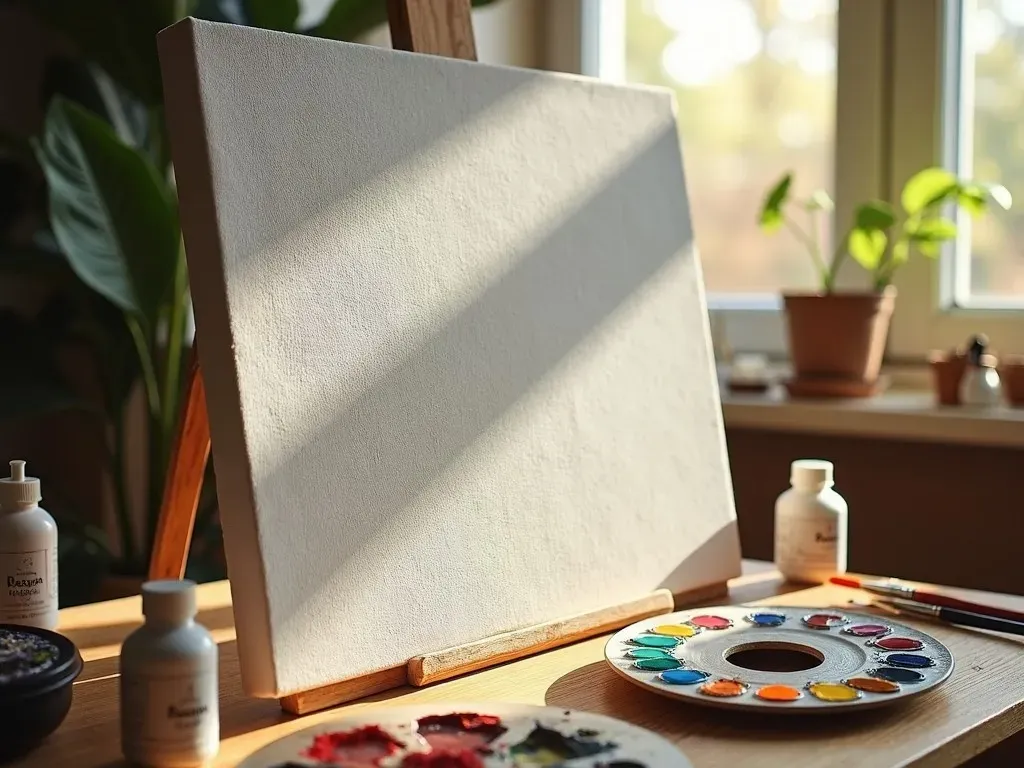
Gesso is a mixture of substances that traditionally includes chalk, gypsum, and a binder. It serves as a primer on canvas, boards, or paper, preparing the surface for painting. This preparation is crucial for the longevity and vibrancy of your artwork. Gesso provides a smooth surface that allows oil paint to adhere better, preventing moisture from the paint from damaging the underlying canvas.

Types of Gesso

There are various types of gesso available, and understanding these differences can help you choose the best product for your oil painting projects. Below are the primary types of gesso used by artists:

Type of Gesso Description
Acrylic Gesso Made with acrylic polymer; flexible and durable. Best for non-absorbent surfaces.
Traditional Gesso Made from chalk or plaster and animal glue; provides a rigid surface. Preferred by classical painters.
Clear Gesso Allows the canvas color to show through; great for mixed media.
Colored Gesso Comes in various colors; useful for painting with transparent or opaque layers.

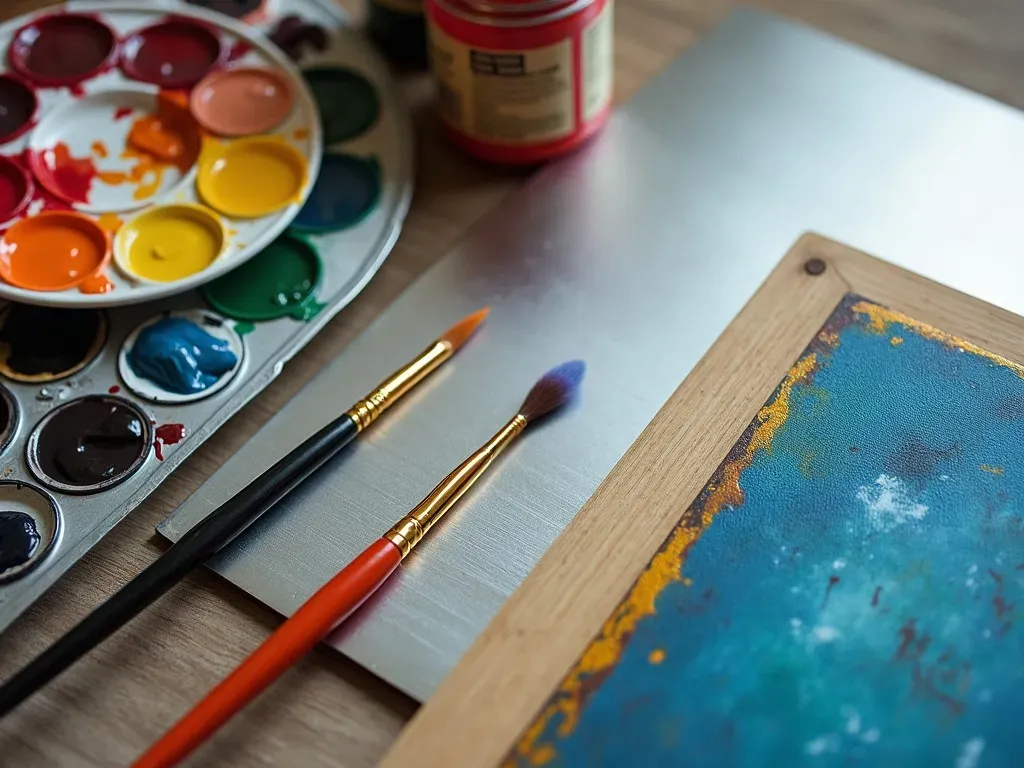
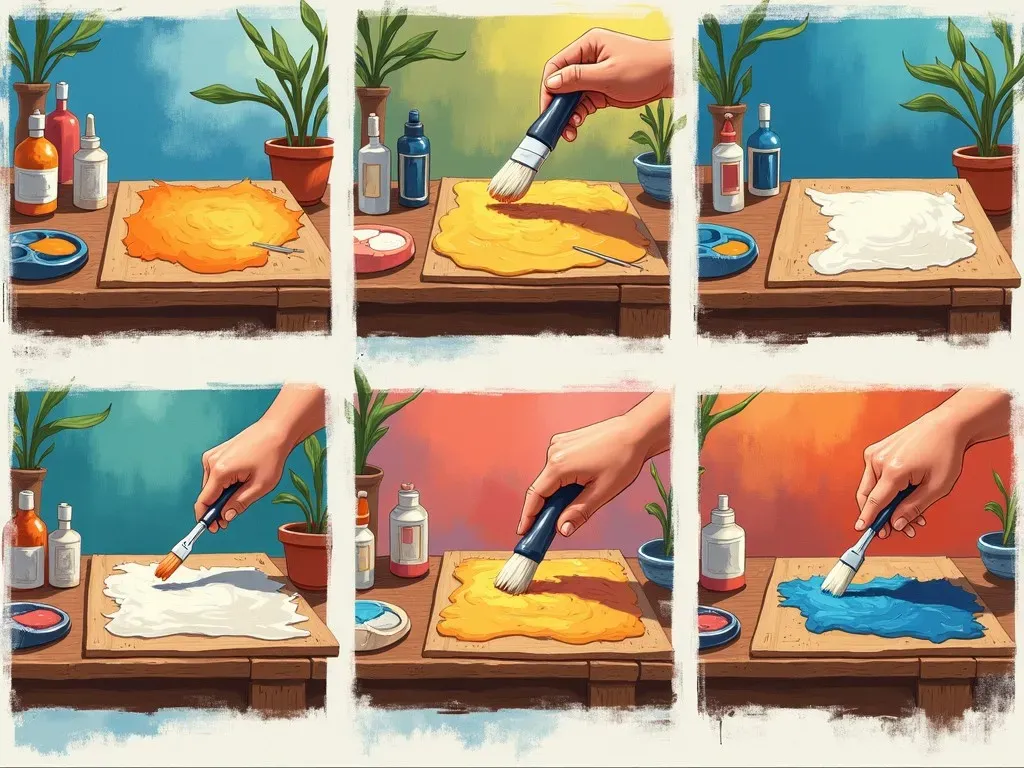
Best Practices for Applying Gesso

There are standard procedures for applying gesso to ensure optimal results in oil painting. Adhering to these practices will undoubtedly enhance your artwork’s overall quality.

  1. Prepare Your Canvas:

    • Start with a clean, dry canvas. Use a damp cloth to remove any dust or debris before applying gesso. This will ensure a smooth finish.
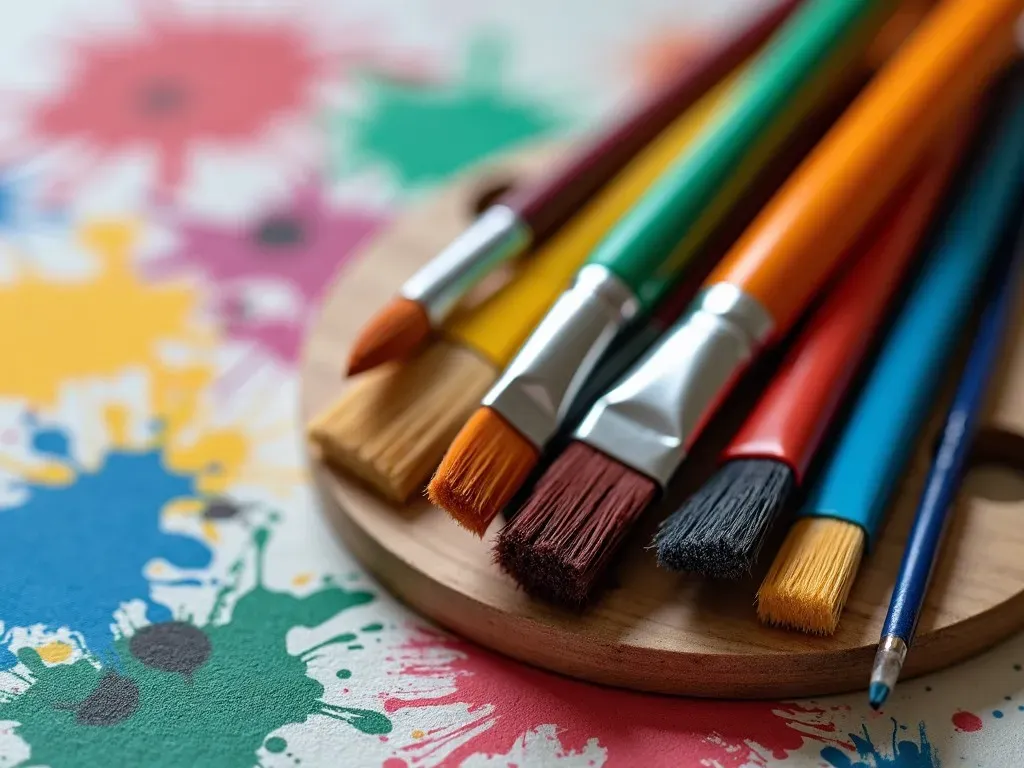
  2. Choose the Right Brush:

    • Use a wide, flat brush to apply gesso evenly. A good choice is a 2-4 inch brush which allows you to cover larger areas quickly.
  3. Apply Multiple Coats:

    • For the best results, apply at least two to three coats of gesso. Allow each coat to dry for a few hours or overnight, depending on humidity levels.
  4. Sand Between Coats:

    • If you prefer a smoother surface for oil painting, lightly sand between applications using fine-grit sandpaper. This will eliminate any texture left by the brush and create a glass-like finish.
  5. Final Drying:

    • Ensure you let the last coat dry thoroughly. A good rule of thumb is to let it dry for 24 hours before starting your painting.

FAQ About Gesso for Oil Painting

1. Do I need to gesso a pre-primed canvas?

No, you don’t have to. However, many artists still apply an additional coat of gesso to enhance the surface’s properties and ensure that the paint adheres better.

2. Is there a difference between oil gesso and acrylic gesso?

Yes, oil gesso is more absorbent and flexible and can be used with oil paints, while acrylic gesso is generally more suitable for acrylic and mixed media, offering a different texture and finish.

3. Can I make my own gesso?

Absolutely! A simple recipe involves combining white acrylic paint with calcium carbonate or plaster. This DIY gesso can be customized to your preferred texture.

4. What is the best gesso for oil painting?

The best gesso can vary based on the artist’s preference, but traditional gesso is often favored for its strong adherence properties, while acrylic gesso is popular for its versatility and ease of use.

Gesso Application Techniques

There are several Techniques that you can consider when applying gesso for oil painting. This section provides an overview of various methods to optimize the priming process.

1. Brushing Techniques:

  • Use horizontal swipes for the first coat to create a base layer.
  • For subsequent coats, use vertical strokes for a different texture and depth.

2. Sponging:

  • For artists looking for a unique texture, you can use a sponge to apply gesso unevenly. This method can create an organic feel to the primed surface.

3. Troweling:

  • Use a putty knife or a palette knife to apply gesso in thick layers, engaging in a more sculptural method. This is useful if you want to create textured patterns on the canvas.

Understanding the Durability of Gesso

It is essential to understand that gesso does not just prepare a surface; it also interacts with the oil paint in unique ways. Here’s what you need to keep in mind:

  • Flexibility vs. Rigidity: Traditional gesso provides a rigid surface that can crack over time. On the other hand, acrylic gesso is more flexible, making it less susceptible to damage from substrate movements.
  • Color Retention: Gesso sets the stage for your color’s vibrancy. The brighter the gesso, the more luminous your colors will appear.

Gesso Storage and Shelf Life

  • Storage: Keep your gesso in a cool, dry place away from direct sunlight. Seal it tightly to prevent drying out.
  • Shelf Life: Generally, gesso has a shelf life of 1-2 years if stored properly. Always check for any consistency changes before application.

Conclusion

In your journey as an artist, understanding and utilizing gesso for oil painting is pivotal. It’s the key to preparing a durable, versatile surface that showcases your creative vision. Incorporating the right techniques and practices will not only enhance the longevity of your artwork but also give you the best experience while creating.

For more detailed guidance, check out this comprehensive resource: The Ultimate Guide to Choosing the Perfect Gesso for Oil Painting.

By following the right procedure and choosing suitable materials, you can elevate your oil painting journey and unleash your full artistic potential!

Reference Video

Unlock Your Creativity: The Ultimate Guide to High Quality Drawing Supplies

When it comes to artistic expression, having the right tools can drastically make a difference in your work. High quality drawing Supplies are not just accessories; they are essential components that can elevate an artist’s craft to a new level. Whether you are a professional artist or a passionate hobbyist, investing in quality supplies can enhance your creativity, improve your skills, and allow you to create masterpieces that truly reflect your vision.

The Importance of Choosing High Quality Drawing Supplies

Artistic Performance and Product Longevity

High quality drawing supplies are designed to perform remarkably better than their cheaper counterparts. For example, a quality graphite pencil will provide smoother lines, better shading capabilities, and less breakage than a low-cost option. Similarly, professional-grade colored pencils have more vibrant pigments and superior blending capabilities.

Type of Supply Benefits Average Cost Range
Graphite Pencils Smooth application, consistent quality $5 – $25 per set
Colored Pencils High pigmentation, excellent blendability $20 – $150
Sketchbooks Acid-free paper, durability, varied textures $7 – $50
Charcoal Sticks Intense blacks, smooth blending, easy to erase $3 – $20 per pack

Investing in high quality materials not only ensures better results but also saves money in the long run. Lower-quality products may require frequent replacements due to breakage or poor performance.

Essential High Quality Drawing Supplies for Every Artist

Below is a breakdown of the essential supplies that every artist should consider adding to their toolkit. This list encompasses both traditional and modern materials.

  1. Pencils:

    • Graphite Pencils: Go for brands that offer a range of H to B grades to suit various shading needs.
    • Colored Pencils: Brands like Prismacolor and Faber-Castell are user favorites.
  2. Inking Supplies:

    • Fine-liners: Look for archival quality liners that will not fade over time.
    • Brush Pens: Offer versatility with brush-like strokes for calligraphy and drawing.
  3. Paper:

    • Sketchbooks: Acid-free paper prevents yellowing and degradation.
    • Mixed Media Paper: Allows for various applications without tearing.
  4. Erasers:

    • Kneaded Erasers: Great for charcoal and graphite work.
    • Vinyl Erasers: Ideal for a clean finish on pencil work.
  5. Accessories:

    • Blending Tools: Such as tortillons and stumps for smoother transitions in pencil drawings.
    • Sharpeners: Opt for high-quality sharpeners to keep your points precise and strong.
  6. Storage Solutions:

    • Art Totes & Cases: To secure your supplies and keep your workspace organized.
  7. Specialty Items:

    • Markers: Alcohol-based markers are ideal for illustrations.
    • Charcoal Pencils: They offer deep, rich darks that can’t be matched.

art supplies Drawing">

Top Brands for High Quality Drawing Supplies

Several brands are known for providing exceptional quality art supplies. Below is a list of some of the Best Professional Art Supplies vendors:

Brand Name Specialties Website
Prismacolor Colored pencils, markers Prismacolor
Faber-Castell Graphite, colored pencils, and accessories Faber-Castell
Canson Paper products Canson
Strathmore High-quality sketchbooks and pads Strathmore
Winsor & Newton Inks and watercolors Winsor & Newton

These brands are recognized for their commitment to quality, ensuring that your drawings can be as vivid and textured as possible.

Facts about Art Supplies and Their Usage

  • 70% of artists say that high-quality supplies significantly improve their artwork.
  • Artists typically spend between $100 to $300 annually on quality supplies.
  • Properly maintained drawing tools can last years, warranting the initial investment.

Frequently Asked Questions (FAQ)

What defines high quality drawing supplies?

High quality drawing supplies are products that have better performance, consistencies, and longevity. They are manufactured by reputable brands that focus on the quality of materials used and the intended application.

Are high quality supplies worth the investment?

Absolutely. Investing in quality ensures that your art looks its best and can significantly reduce frustration due to product performance issues.

Where can I find high quality drawing supplies?

You can find high quality drawing supplies online at dedicated art supply stores like Jerry’s Artarama or Blick Art Materials.

How often should I replace my drawing supplies?

This largely depends on usage, but you should regularly examine the condition of your supplies and replace them when performance declines or they become unusable.

Can I find affordable high quality supplies?

Yes. While some supplies may come at a premium, discounts, sales, and bulk-buy options can help you acquire quality materials without breaking the bank. Consider looking for sets or student discounts from reputable brands.

By focusing on high quality drawing supplies, artists can fully express their creative vision, ensuring that each sketch, illustration, or painting is a true reflection of their passion and skill. Exploring reputable vendors and maintaining your tools will keep your artistic journey both enjoyable and rewarding.

Unleash Your Creativity: Transform Your Art with Stunning Paint Backgrounds!

Paint Background – the perfect blend of vibrant colors and textures to enhance any artwork, from delicate watercolor landscapes to bold oil portraits. The right paint background can dramatically change the mood and depth of your art piece, offering a captivating surface that harmonizes with the main subject.

Understanding the Importance of Paint Backgrounds

When creating a piece of art, the background plays a pivotal role in the overall appearance and emotional impact of the final work. A well-executed paint background can serve as a launching pad for the foreground subjects, guiding the viewer’s eye and creating a seamless flow of composition. Here are several elements that make paint backgrounds crucial:

  1. Sets the Mood: The colors and textures used can significantly influence the feeling of the artwork—whether it conveys calm, joy, or drama.
  2. Creates Depth: Backgrounds can add layers to the painting, giving a three-dimensional effect.
  3. Enhances the Subject: A thoughtfully designed background can complement and highlight the main focus of the piece.

Facts About Paint Backgrounds

Type of Paint Background Description Ideal Techniques
Solid Color A single uniform color Flat washes, layering
Textured Incorporating various textures Impasto, sponge, or mixed media
Gradient A smooth transition between colors Blending, glazing
Patterned Repeating visual motifs Stenciling, stamping
Abstract Non-representational forms Pouring, splattering, or layering

How to Choose the Right Paint Background

Choosing the right paint background for your artwork involves several considerations. Here is a guideline to help you decide:

  1. Subject Matter: Match the background style to the main subject. A soft, blurred background can enhance a detailed portrait, while a bright, bold pattern may suit abstract works.
  2. Color Theory: Utilize complementary or analogous colors to harmonize or contrast with your main colors.
  3. Texture and Finish: Consider what kind of texture will best enhance your artwork. For instance, smooth finishes provide elegance, while coarse textures can add visual intrigue.

Techniques for Creating Paint Backgrounds

Creating the perfect paint background requires practice and the right techniques. Below are some popular methods used by artists around the world.

1. Wet-on-Wet Technique

This method involves applying wet paint onto wet surfaces, allowing for smooth blending and soft transitions. Ideal for watercolors, this approach creates soft, luminous effects.

2. Dry Brushing

A dry brush technique is used with minimal paint on a dry brush, producing a textured, scratchy effect perfect for creating landscapes or adding depth.

3. Sponging

Using a sponge can introduce repeating patterns or textures into your background. This technique works well for abstract pieces or landscapes, providing organic-looking detailing.

4. Stenciling

Stencils allow for precision in patterns and motifs, giving a clean finish. This technique can be applied using multiple colors for added depth.

5. Pouring

For those looking to experiment, pouring paints can create abstract backgrounds with unexpected and beautiful results.

Layering Techniques

  • Glazing: Applying transparent layers to build luminosity.
  • Impasto: Thicker paint application for dimensional texture.
  • Sgraffito: Scratching into wet paint to reveal the underlayer.

Examples of Paint Backgrounds in Famous Art

Artist Title Background Style Description
claude monet Water Lilies Soft and Impressionistic Subtle hues merge with vibrant flora, creating tranquility.
Jackson Pollock Number 1 Abstract and Dynamic Dripped paint creates an energetic, chaotic background.
Vincent van Gogh Starry Night Whirling and Expressive Swirling forms give motion and depth to the night sky.

Famous Paintings">

For in-depth study on various painting methods and styles, resources such as The Spruce Crafts provide valuable insights on creating impactful backgrounds.

Frequently Asked Questions

Q1: What type of paint is best for backgrounds?
A1: Acrylics are particularly popular due to their fast-drying properties and versatility, but oils and watercolors can also work well depending on the desired effect.

Q2: Can I use pre-made backgrounds?
A2: Yes, there are many high-quality pre-made paint backgrounds available for download on platforms like Freepik and Unsplash. These can be beneficial if you’re short on time or need Inspiration.

Q3: How can I create a cohesive look between my background and foreground?
A3: Utilize similar color palettes and intentional contrasts. The key is to allow the background to support the foreground without overshadowing it.

Q4: Are there digital resources available for paint backgrounds?
A4: Definitely! Websites like Pixabay offer free and premium options for digital paint backgrounds that can enhance your graphic design projects.

Conclusion

Exploring paint backgrounds opens a world of endless creative possibilities. From carefully constructed layers to spontaneous abstract applications, the perfect background complements your artistry, elevating it to new heights. Experiment with various techniques, choose your palette wisely, and let your imagination run wild with the captivating power of paint backgrounds!

Reference Video

Unlock the Palette: What Kind of Paint Does Bob Ross Use?

Bob Ross primarily used oil paints during his iconic television series The Joy of Painting. Known for his wet-on-wet technique, he relied on high quality oil paints that allowed him to blend and layer effortlessly. This technique facilitated the magic of creating mesmerizing landscapes and serene vistas right before the viewer’s eyes.


The Essence of Bob Ross’ Paints

Bob Ross’ oil paints were specially formulated to enhance the wet-on-wet painting method. This process requires a specific kind of paint that remains workable for longer periods. Here’s a breakdown of the essential products he used, including his preferred color palette.

Bob Ross Paint Components

  1. Type of Paint: Oil Paints
  2. Texture: Smooth and firm consistency
  3. Mediums Used:
    • Liquid White
    • Liquid Black
    • Liquid Clear
    • Paint Thinner

Table: Bob Ross Painting Mediums

Medium Purpose
Liquid White Base layer enabling other colors to blend easily
Liquid Black For deep shades and shadows
Liquid Clear Provides a smoother application and transparency
Paint Thinner Thins paint for a more fluid application

Bob Ross Color Palette

Bob Ross introduced viewers to a wide spectrum of colors, specifically designed to capture nature’s beauty. Here are some of the notable hues from his collection:

List of Common Bob Ross Colors

  • Titanium White
  • Phthalo Blue
  • Alizarin Crimson
  • Sap Green
  • Van Dyke Brown
  • Bright Red
  • Cadmium Yellow
  • Yellow Ochre
  • Midnight Black
  • Indian Yellow
  • Burnt Umber

FAQ: Common Questions about Bob Ross Paints

What kind of paint did Bob Ross use on his show?
Bob Ross used oil paints exclusively throughout his episodes.

Did Bob Ross ever use acrylic paint?
While Bob Ross is best known for his oil paintings, artists can adapt the wet-on-wet technique to acrylics, although using a retarder is recommended to slow down drying.

What brands of oil paint did Bob Ross recommend?
Bob Ross endorsed his line of paints, but you can also use brands like Winsor & Newton and Grumbacher which offer high-quality oil paints.

What is Liquid White and how is it used?
Liquid White is a medium that Bob Ross used to create a wet base on the canvas, allowing other colors to blend smoothly.

Tools of the Trade

In addition to oils, Bob Ross utilized a variety of tools that complemented his painting Techniques. Below are some key Supplies:

Essential Bob Ross Painting Supplies

  • Brushes: Bob primarily used fan brushes, large and small round brushes, and 1-inch oil brushes.
  • Palette Knives: Crafted for applying paint in a variety of styles, particularly for creating texture.
  • Canvas: Typically, Bob used a standard 18” x 24” stretched canvas, specifically designed for wet-on-wet oil painting.

Table: Bob Ross Brush Types

Brush Type Function
Fan Brush Great for trees and foliage
Round Brush Versatile, used for details and blending
Palette Knife Ideal for creating sharp lines and textures
1-inch Brush Used for large areas and blending backgrounds

The Science Behind Bob Ross’ Techniques

Bob Ross’ approach to oil painting is grounded in both art and science. The wet-on-wet technique allows for unique blending capabilities that are hard to achieve with dry paint applications. The oil paint remains workable, which means colors can be smoothly transitioned without mudding them up.

The Importance of Oil Paints

Unlike acrylics, oil paints have a slow drying time, allowing the artist to work on a painting over a longer period. This is especially crucial for Bob Ross’s style where blending multiple colors seamlessly creates the soothing landscapes he is known for.

Comparisons: Oil Paint vs. Acrylic

Feature Oil Paint Acrylic Paint
Drying Time Slower (days to weeks) Faster (minutes to hours)
Blending Ability Superior for wet-on-wet Limited unless mixed with retarders
Color Depth Richer, more vibrant tones Can appear flat without glazing
Cleanup Requires solvents Soap and water

Resources for Bob Ross Products

To replicate Bob Ross’s artistry, it helps to source the right products. Many online retailers provide authentic Bob Ross art supplies. Here are a couple of recommendations:

Painting Techniques to Consider

Mastering Bob Ross’ techniques involves not just choosing the right supplies but also practicing specific methods. Here are popular techniques he used:

  1. Wet-on-Wet Technique: Applying wet paint onto wet paint for smoother transitions.
  2. Algebra of Light: Understanding how to create the illusion of light through color and strokes.
  3. Palette Knife Applications: For creating textures like mountains and tree bark.

Final Thoughts

Whether you’re a beginner looking to start your painting journey or an experienced artist wanting to delve into Bob Ross’ world of oil painting, understanding the tools and techniques he employed is fundamental. With the right materials and a little practice, you might just find yourself painting alongside the man who taught countless viewers to "let everything happen to you."

Unleash Your Creativity: Discover the Best Bulk Art Supplies

Are you an artist, educator, or craft lover in search of bulk art supplies? You’re in the right place! Bulk art Supplies are not only budget-friendly but also ideal for schools, workshops, and personal projects. Whether you are creating the next masterpiece or planning a group crafting event, purchasing supplies in bulk can save both money and time. In this article, we will explore various options, tips for buying, and highlight top suppliers for your art supply needs.

Why Choose Bulk Art Supplies?

Buying art supplies in bulk offers multiple benefits, including:

  1. Cost Savings: Bulk purchases often mean lower prices per item. This is particularly advantageous for educators or community centers where supplies are needed in large quantities.

  2. Convenience: Having an ample supply of materials can prevent delays in creative projects and helps to ensure that you’re never short on essential items.

  3. Variety: Many art supply retailers offer different types of products in bulk, allowing for creativity across various mediums, including painting, drawing, and more.

According to a recent survey conducted by art supply retailers, 76% of educators reported significant savings by purchasing bulk art supplies for classrooms, which highlights the economic advantages of this approach.

Bulk Art Supplies: Categories and Examples

When searching for bulk art supplies, consider the various categories that fit into your projects:

Category Examples Approx. Pricing Range
Painting Acrylic paints, watercolors, oil paints $10 – $50
Drawing Sketch pads, colored pencils, charcoal $15 – $40
Crafts Scissors, glue, craft paper $5 – $30
Canvas Bulk canvases of varying sizes $20 – $100
Specialty Varnishes, mediums, and additives $10 – $40

Keep in mind that prices fluctuate based on vendor and ordering quantities. Always check for ongoing sales or promotional discounts.

Top Retailers for Bulk Art Supplies

When it comes to sourcing bulk art supplies, several retailers stand out due to their reputability and product variety:

  • Jerry’s Artarama: Known for a diverse range of products and significant discounts for bulk purchases. They offer promotional deals throughout the year that can be very beneficial.

  • Michaels: A popular choice among both hobbyists and professionals, offering a wide variety of bulk supplies including paints, canvases, and crafting kits. MichaelsPro caters specifically to customers looking to buy in bulk.

  • BLICK Art Materials: A well-established retailer famous for its extensive range of art supplies. They provide great deals on bulk orders, particularly for educators and institutions.

  • U.S. Art Supply: Offers factory-direct pricing on a plethora of art materials ideal for various user levels, from beginners to professional artists.

  • Art Supplies Wholesale: This retailer focuses on presenting major brand merchandise at wholesale pricing, which can be very cost-effective for organizations and schools.

How to Save on Bulk Art Supplies

  1. Sign Up for Newsletters: Many retailers offer special discounts to subscribers. This is particularly useful during holiday sales and back-to-school promotions.

  2. Take Advantage of Sale Events: Look out for seasonal sales or clearance events where you can stock up on supplies at a fraction of the regular price.

  3. Join Loyalty Programs: Many art supply retailers have loyalty programs that reward frequent shoppers with discounts, points, or exclusive access to sales.

  4. Compare Prices Online: Utilize various platforms to check for the best deals. Websites like Honey or RetailMeNot can provide additional coupon codes to maximize savings.

Tips for Bulk Ordering

  • Assess Your Needs: Determine the quantity required for your projects. Buying excessively might lead to waste, especially with perishable supplies like paints.

  • Check Material Quality: Always verify that the bulk products meet your quality standards. You can read reviews or request samples before placing a large order.

  • Consult with Fellow Artists/Teachers: Collaborate with peers to pool orders together. This can lead to even greater savings and ensure you have a variety of supplies.

Frequently Asked Questions

1. What bulk art supplies are best for classrooms?

Commonly used bulk supplies for classrooms include tempera paints, large drawing pads, and assorted brushes. Opt for items that have been tested for safety, especially around young children.

2. Are there any downsides to buying in bulk?

While bulk purchasing is economical, it can sometimes result in storage space issues. It’s essential to ensure you have enough space to accommodate larger quantities of materials.

3. How can I find the best prices for bulk art supplies?

Conduct thorough comparisons online across different retailers, and subscribe to newsletters to receive notifications about sales. Utilizing cashback websites can also provide additional savings.

4. Do bulk art supplies have expiration dates?

Some materials like paints or glues can have expiration dates. Always check labels and store them in appropriate conditions to maximize shelf life.

5. Can I return bulk items if I no longer need them?

Return policies vary by retailer. Always review the return policy beforehand, especially when buying large quantities where returns might be cumbersome.

Conclusion

In the vibrant world of art, bulk art supplies serve as an essential resource for enthusiasts and professionals alike. The advantages of purchasing in bulk, from significant cost savings to convenience, are undeniable. With the right knowledge and tools at your fingertips, you can successfully navigate the landscape of art supplies to boost your creative projects and endeavors.

Reference Video

Discover the Vibrancy of Winton Oil Paint: Your Go-To Choice for Artistic Expression!

Winton Oil Paint, a premium offering from Winsor & Newton, is known for its stunning color quality and affordability, making it an ideal choice for both amateur and professional artists. With a diverse palette of 55 brilliant hues, Winton Oil Colors are made from fine art pigments and offer a smooth consistency that allows for excellent mixing and layering capabilities.


Why Winton Oil Paint Stands Out

When choosing the right oil paint, artists often navigate the delicate balance between quality and cost. Winton Oil Paint provides an impressive solution—it offers the quality of professional-grade oil paints at a price that both students and experienced artists can appreciate. The range works wonderfully for artists who require larger volumes of paint, making it a staple in many studios worldwide.

Key Features of Winton Oil Paint

  • Affordability: Competitively priced, making fine art accessible.
  • Wide Color Range: 55 colors to choose from, allowing endless creative expression.
  • Quality Pigments: Made with fine art pigments ensuring vibrant, lightfast colors.
  • Ease of Use: Designed for easy mixing and application.
  • Consistent Texture: Slightly stiffer than traditional oils, suitable for various Techniques.

Quick Facts:

Feature Details
Brand Winsor & Newton
Color Range 55 Colors
Tube Sizes 21ml, 37ml, and larger options
Ideal For Students, Amateurs, Professionals
Mixing Capability Excellent
Consistency Uniform & stiffer than Artists’ range

Expanding Your Color Palette: Key Winton Oil Colors

The Winton Oil Paint line features a rich selection of colors that every artist should consider incorporating into their work. Here’s a quick overview of some popular hues:

Most Popular Winton Colors:

Color Name Color Code Primary Use
Titanium White 101 Mixing, highlights
Cadmium Yellow Hue 107 Brightening and warm highlights
Permanent Alizarin Crimson 112 Deep red tones
French Ultramarine 130 Rich blue skies
Viridian Hue 178 Fresh greens

Recommended Color Sets

Investing in a color set is a great way to start with Winton Oil Paint. Here are some popular sets to consider:

  • Winton Oil Color Introductory Set: Contains vibrant, essential colors in 21ml tubes.
  • Professional Color Set: Includes advanced hues perfect for experienced artists looking for variety.

Tips for Working with Winton Oil Paint

Whether you are a beginner or an experienced artist, using Winton Oil Paint can unlock new levels of creativity. Here are some tips to make the most of your painting experience:

  1. Prepare Your Workspace: Ensure a well-ventilated area and gather all necessary tools—brushes, palettes, and mediums.
  2. Experiment with Mixing: Winton’s consistency allows you to mix colors effectively. Start with a small amount of paint to test blending.
  3. Use Quality Tools: Pair with Winton-specific brushes and palettes for the best results.
  4. Layer Your Paint: Start with thin layers before moving to thicker applications to create depth and texture.
  5. Keep Your Paints Sealed: Proper storage in a cool, dry place will prolong the life of your oil paints.

Additional Painting Resources

For more tips and tutorials on using Winton Oil Paint effectively, visit Winsor & Newton for detailed information on techniques and resources.

Frequently Asked Questions

What is the difference between Winton and Artist Oil Color?

Winton Oil Colors are generally more affordable and designed for artists who use larger quantities, while the Artist Oil Colors offer a higher pigment concentration for professionals seeking unparalleled intensity and versatility.

How can I clean my brushes after using Winton Oil Paint?

Brushes can be cleaned with a suitable solvent such as turpentine or mineral spirits. Make sure to wash them thoroughly with soap and water afterward.

Are Winton Oil Colors water-mixable?

No, Winton Oil Colors are traditional oil paints and require solvents for thinning and cleaning. However, Winsor & Newton does offer water-mixable oil paints in a different range.

Can Winton Oil Colors be used for professional work?

Absolutely! While Winton is often marketed for students and amateur artists, many professionals use it for large paint applications, offering beautiful results.

Conclusion

Winton Oil Paint is an exemplary choice for artists seeking quality and affordability. With a wide array of colors and user-friendly properties, it’s no wonder that it remains a favorite among many creatives. Whether you’re just starting or enhancing your professional palette, Winton Oil Paint offers possibilities limited only by your imagination.

Explore the vibrant world of Winton Oil Paint today—your canvas awaits!

Reference Video

Which is the Best Surface for Oil Paints? Discover the Top Choices for Your Masterpiece!

When it comes to oil painting, choosing the right surface is crucial for achieving the desired artistic effect. So, which is the best surface for oil paints? The answer varies depending on your painting style, budget, and personal preferences. Here’s a comprehensive guide that explores the different options available for oil painting surfaces, highlighting their pros and cons to help you find the perfect foundation for your artwork.

Understanding Oil Painting Surfaces

Oil paints adhere well to various surfaces, including canvas, wood panels, and paper. The choice of surface affects not just the final look but also how the paint interacts with the medium. Common surfaces used for oil painting include:

  1. Canvas (stretched and primed)
  2. Wood panels
  3. MDF (medium density fiberboard)
  4. Paper
  5. Canvas boards
  6. Metal
  7. Glass and plastic

Each of these surfaces offers a unique texture and feel, making them suitable for different painting styles and Techniques.

Pros and Cons of Popular Oil Painting Surfaces

Surface Type Pros Cons
Canvas Lightweight, flexible, widely available Can warp over time, may require priming
Wood Panels Rigid, less prone to warping, absorbs less paint Heavier, typically more expensive
MDF Affordable, smooth surface, doesn’t warp More absorbent, may require sealing before use
Paper Convenient, budget-friendly, portable Less durable, can buckle with heavy paint applications
Canvas Boards Convenient, affordable, easy to store May lack the flexibility of stretched canvas
Metal Unique texture, durable, enhances certain styles Requires special preparation, can be costly
Glass/Plastic Extremely smooth, great for specific techniques Requires careful handling, can be slippery

Popular Options: Exploring Each Surface Type

1. Canvas

Canvas is perhaps the most popular surface for oil painters. Both cotton and linen canvases are available, with linen often preferred for its durability and texture.

  • Cotton Canvas: Generally more affordable and readily available, making it ideal for beginners.
  • Linen Canvas: A high-quality option that’s more durable and has a finer texture, preferred by professional artists.

Prep Tip: Always ensure your canvas is properly primed to prevent oil from seeping into the fibers, which can lead to deterioration over time.

2. Wood Panels

Wood panels offer a rigid surface that can handle heavy layers of paint. They are particularly favored for detailed work.

Advantages:

  • Less warping compared to canvas.
  • Suitable for both traditional oil painting and mixed media.

Preparation: It’s important to sand and seal your wooden surface with a primer suitable for oils to prevent absorption.

3. MDF (Medium Density Fiberboard)

MDF provides an affordable and smooth surface for painting.

Usage:

  • Good for beginners who want to experiment.
  • Supports a range of techniques due to its smooth texture.

Caution: MDF can absorb moisture, so always seal it before applying paint.

4. Paper

Specially designed oil painting paper is an emerging option that offers portability and convenience, especially for studies and quick sketches.

Benefits:

  • Lightweight and cost-effective.
  • Available in various textures.

Limitation: Not as durable as other surfaces; heavy applications might cause buckling.

5. Metal

Metal surfaces can create striking artworks with their reflective quality. However, they often require additional preparation.

Surface Preparation:

  • Must be sanded and primed properly to ensure adherence.

Factors to Consider When Choosing an Oil Painting Surface

When selecting the best surface for your oil paintings, consider the following factors:

  • Painting Techniques: Certain techniques may work better with specific textures (e.g., thick impasto works well on canvas, while smooth glazes benefit from wood panels).
  • Budget: Your budget will influence the materials you can purchase. For instance, canvas is typically more affordable than a high-quality wood panel.
  • Portability: If you are a plein air painter, lightweight options like canvas boards or paper may be preferable.
  • Durability: Consider how long you want your artwork to last; wood panels can offer longevity compared to paper.

FAQs About Oil Painting Surfaces

Q1: Can I paint oil on any surface?
A1: While oil paints adhere to various surfaces, not every surface is recommended. It’s best to use primed materials specifically designed for oil paint.

Q2: What is the best budget option for beginners?
A2: Cotton canvas or oil painting paper is a great choice for beginners due to their affordability and accessibility.

Q3: How do I prepare my surface for oil painting?
A3: Ensure the surface is clean and dry. Use a primer (for wood and canvas) to prevent oil absorption, and let it dry before beginning your painting.

Q4: Is there a preferred surface for detailed work?
A4: Wood panels are often preferred for detailed work because of their rigidity and smooth texture.

Q5: How does the surface affect drying time?
A5: The drying time can be influenced by the surface type, with absorbent surfaces like paper slowing down the drying process compared to less absorbent ones like primed canvas.

Conclusion

Choosing the best surface for oil paints is essential for achieving the desired outcome in your artwork. As you delve deeper into the world of oil painting, consider experimenting with various surfaces to discover what resonates with your artistic style. Each option offers unique possibilities that can enhance your creative expression. For more information on oil painting surfaces, visit ArtWeb.

Discover the Magic of Acrylic Paint Paintings: A Beginner’s Guide to Vibrant Art

Acrylic paint paintings are a popular form of artistic expression that utilize fast-drying paint made of pigment suspended in acrylic polymer emulsion. This unique medium allows for an incredible range of styles, Techniques, and effects, making it ideal for both beginners and experienced artists alike.

The Versatility of Acrylic Paint

Acrylic paints are renowned for their versatility and the ability to mimic various other mediums such as watercolor, oil paint, and even gouache. This secures their place as a favorite among artists. Here are some reasons why acrylic paint is so beloved:

Quick Drying

  • Speed: Acrylic paints dry quickly, allowing artists to work swiftly and layer effectively without long waiting periods.
  • Blending: Because they dry quickly, artists can create sharp edges or blend colors seamlessly depending on their technique.

Water Soluble

  • Ease of Use: Acrylic paints can be thinned and cleaned up with water, which makes them more user-friendly than oil paints.
  • Safe for Beginners: The non-toxic nature of acrylic paints allows for a worry-free experience, especially for young artists or those new to painting.

Range of Textures

Acrylics can be manipulated to create various textures:

  • Thick Impasto: Apply paint thickly with a palette knife to create a three-dimensional effect.
  • Thin Wash: Thinned with water for a watercolor-like effect.

Acrylic Paint Composition Table:

Component Function
Pigment Provides color
Binder Adheres pigment to surface
Solvent Adjusts viscosity (water for acrylics)
Additives Enhance drying time, texture, and finish

Techniques for Acrylic Beginners

Many acrylic painting techniques can help beginners explore their creativity and build their skills. Here’s an overview of some essential techniques:

  1. Wet-on-Wet: You apply wet paint onto wet paint for smooth blending.
  2. Dry Brush: A dry brush is used to create texture and enhance details.
  3. Glazing: Applying a thin, transparent layer of paint over dried paint to alter color and depth.
  4. Pouring: Pouring acrylic paint onto the canvas to create abstract patterns and cells.

Acrylic Painting Supplies Checklist

Before embarking on your acrylic painting journey, gather essential Supplies:

Supplies Description
Acrylic Paints Various colors based on your palette
Brushes Different sizes: flat, round, and filbert
Canvas or Paper Suitable for acrylic work (heavyweight)
Palette For mixing paint
Water Container For rinsing brushes
Rags or Paper Towels For cleaning and drying

Popular Themes for Acrylic Paintings

Acrylic paint allows artists to explore various themes. Here are some popular selections:

  • Landscapes: Natural sceneries, often vibrant with color variations.
  • Abstract Art: Using shapes, colors, and lines to create non-representational artwork.
  • Floral Designs: Capturing the beauty of nature through colorful floral arrangements.

Sources for Inspiration

To further inspire your acrylic painting journey, consider checking out these resources:

Frequently Asked Questions (FAQ)

What is the best type of canvas for acrylic painting?

For acrylic painting, a heavy-weight canvas or canvas board specifically designed for acrylics is recommended. These surfaces are primed to withstand the moisture of acrylic paint and prevent warping.

How do I clean my brushes after using acrylic paint?

Immediately rinse your brushes in water after use. It may help to use mild soap for any stubborn paint that doesn’t wash out easily. Be gentle to preserve the brush’s shape.

Can I use acrylic paint on wood?

Yes! Acrylic paint adheres well to wood surfaces. Ensure the wood is adequately prepared with a primer or gesso for the best results.

What are some beginner-friendly acrylic painting projects?

  • Simple still lifes (e.g., fruit or flowers)
  • Abstract paintings using colors you love
  • Landscapes focusing on basic shapes and colors

Techniques to Explore as You Progress

Once comfortable with basic techniques, consider exploring advanced techniques to elevate your artworks:

  • Acrylic Pouring: This popular trend involves pouring multiple colors of paint together to create unique abstract designs.
  • Mixed Media: Combine acrylics with other materials like pastel, paper, or fabric for added complexity and depth.

The Psychology of Color in Acrylic Paintings

Understanding color theory can significantly enhance your work. Colors affect emotions and perception:

Color Emotion
Blue Calmness and serenity
Red Energy and passion
Yellow Happiness and warmth
Green Balance and harmony

Tips for Building Your Skills

  1. Practice Regularly: The more you paint, the better you’ll become. Don’t be afraid to experiment.
  2. Watch Tutorials: Online platforms provide various resources geared toward learning new techniques.
  3. Seek Feedback: Share your work in community groups for constructive criticism and support.
  4. Attend Workshops: Engage with fellow artists for tips, technique sharing, and networking.

Embrace the fascinating world of acrylic paint paintings, and let your creativity flow!

Reference Video

What is One Advantage of Acrylic Paint Over Oil? Discover the Game-Changer for Artists!

One significant advantage of acrylic paint over oil is its rapid drying time. While oil paints can take weeks or even months to dry fully, acrylics dry within minutes, allowing artists to layer and paint much more efficiently.

Speed and Efficiency in the Creative Process

Acrylic paints dry remarkably quickly, often within 10 to 30 minutes, depending on the conditions like humidity and temperature. This is a substantial advantage for artists who prefer not to wait long between layers. The fast drying time allows for immediate adjustments, applications of new layers, and the ability to work on multiple pieces simultaneously without the risk of smudging or disturbing previously applied paint.

Comparison of Drying Times

Paint Type Average Drying Time Layering Capability Potential Issues
Acrylic 10-30 minutes Immediate layering Colors may darken as they dry.
Oil Days to months Longer wait for layering Possible dust contamination.

This table illustrates the drastically different timelines associated with drying between acrylic and oil paints, highlighting acrylic’s suitability for artists needing agility and speed in their work.

Versatility of Acrylic Paint

Another essential advantage of acrylic paint is its versatility. Acrylics can be used on a variety of surfaces beyond canvas—paper, wood, fabric, and even glass. This flexibility makes acrylics a favorite for mixed media artists. On the other hand, while oil paints are typically reserved for canvases and specific boards due to their heavier consistency, acrylics easily adapt, allowing artists to express their creativity on unconventional materials.

Artistic Freedom with Surface Options

  • Canvas: The traditional choice that works well with both mediums.
  • Paper: While oil can warp paper, acrylic remains flat.
  • Wood: Acrylics bond well, allowing for the creation of unique mixed-media pieces.
  • Fabric: Acrylics are perfect for fabric painting, lasting longer and retaining their vibrancy.

Safety and Cleanup

Acrylic paint ranks higher in terms of safety compared to oil paints. Often, oil paints require toxic solvents for thinning and cleaning, making them a health hazard if proper ventilation or protective gear is not used. Conversely, acrylics can be cleaned up easily with soap and water, emphasizing their accessibility for artists of all levels.

Safety Comparison

Paint Type Cleaning Solvent Toxicity Level Safety Precautions
Acrylic Soap and water Low (non-toxic) Minimal, basic hygiene practices.
Oil Solvents (turpentine) High (can cause health risks) Must use proper ventilation.

Not only do acrylics offer artists faster drying times and versatility, but they also provide a safer environment for more health-conscious creatives.

Affordability and Availability

A major financial benefit of acrylics is their affordability. Acrylic paints generally cost less than oil paints, and artists using acrylics often require fewer specialized tools and materials. For those operating on tight budgets, the lower cost of acrylic sets, brushes, and surfaces makes starting and expanding a painting repertoire much easier.

Cost Comparison

Item Acrylics Oils
Paint Tubes (per oz) $0.50-$1.00 $2.00-$5.00
Brushes Lower range Higher range
Clean Up Supplies Minimal Higher

Layering Techniques and Blending

While oil paints are often praised for their blending capabilities due to slower drying times, acrylics offer unique advantages in layering Techniques. The rapid drying time allows for quick adjustments without compromising the underlying layers, making it easier to create specific effects such as glazing or impasto.

Layering Comparison

Technique Acrylic Oil
Glazing Quick adjustments possible Slower, risk of muddying colors
Impasto Can create texture quickly Takes longer to build up

Artists who prefer to work quickly often find that acrylics serve them better through efficient layering and texture applications.

FAQs

Q1: Can you mix acrylic with oil paints?

A1: No, mixing acrylic with oil paints is not advisable because they have different bases and drying times. Acrylics are water-based, while oils are oil-based, leading to incompatibility.

Q2: Does acrylic paint fade over time?

A2: Acrylic paint is generally durable and Fade-resistant when kept out of direct sunlight. However, prolonged exposure to UV light can cause fading. Proper varnishing can help protect the artwork.

Q3: Can acrylic paintings last as long as oil paintings?

A3: While oil paintings have a long history of durability and longevity, acrylics can also last for generations if stored and displayed properly. Their resistance to yellowing is a plus.

Q4: What is the best way to keep acrylic paints from drying out on the palette?

A4: Using a palette with a lid or a wet palette with a damp sponge can help keep acrylic paints moist while working, allowing more time for blending and adjustments.

Q5: Can you use acrylic paints on top of oil paints?

A5: It is not recommended, as the acrylics may not adhere properly to the oil base. Always apply acrylic first if planning on layering.

For additional information, you can refer to Fine Art Tutorials for further details on oil vs acrylic paints.

By making informed choices in the medium you select, the potential for creative expression can expand significantly. Acrylic paint indeed holds a distinct advantage over oil in terms of drying time, versatility, safety, affordability, and ease of use, making it an excellent choice for artists seeking an efficient and effective painting experience.

Unlock Your Creative Potential: The Ultimate Guide to Artist Painting Tools

Artist Painting Tools

Artist painting tools are essential instruments that facilitate the creative expression of painters, regardless of the medium they choose to work with. From brushes and palettes to knives and heat guns, the right tools can significantly enhance an artist’s ability to translate their vision onto the canvas. Let’s delve into the various artist painting tools, their uses, and why they are indispensable for any artist looking to hone their skills and elevate their craft.

The Essential Tools for Art Painting

Brushes

At the heart of every artist’s toolkit are brushes. The variety of brushes available can be overwhelming; however, understanding their unique characteristics will help artists choose the right one for their project. Here is a breakdown of common brush types:

Brush Type Description Best Used For
Flat Brush Has a wide and flat bristle head Bold strokes and washes
Round Brush Round shape, tapered tip; versatile and widely used Detail work and glazing
Filbert Brush Oval-shaped bristles combine features of flat and round brushes Soft edges and blending
Fan Brush Shaped like a fan, useful for texture applications Texture and foliage
Wash Brush Large, flat bristles intended for broad strokes of color Watercolor and large areas

Palette Knives

Palette knives are not just used for mixing paint; they can also be used to apply paint to the canvas, enabling a unique texture. Artists appreciate the sharp, flat edge, which allows for scraping and layering, providing depth to their work.

Palettes

A proper palette is a crucial aspect of the artist’s setup. Choices range from wooden, glass, to disposable palettes, each offering unique benefits. Artists often select their palette based on the medium they are working with, as well as personal preference.

Easel

An easel supports the canvas while the artist works, allowing for comfortable and effective painting. Portable easels are great for artists on the go, whereas studio easels provide stability and height adjustability in a home studio.

Mediums

Various mediums like oil, acrylic, and watercolor each require specific tools and Techniques for application. Artists often use mediums to alter the paint’s consistency, drying time, and finish. Here’s a quick rundown of common mediums:

Medium Characteristics Ideal Applications
Oil Paint Rich, vibrant color; slow-drying Detailed work and layering
Acrylic Paint Quick-drying, versatile, and water-soluble General painting and experimental work
Watercolor Translucent, fluid; best for washes and layers Landscapes and delicate details

Cleaning Tools

Tools for cleaning are vital for maintaining the longevity and performance of brushes and other painting tools. This includes brush soap, cleaning solvents, and paper towels, which ensure that each tool remains in optimal condition.

Additional Tools

  • Palette Cups: For holding paint while you work.
  • Mahl Stick: A long stick used to steady the hand for fine detail work.
  • Drop Cloths: Protect surfaces when painting.

Facts on Artist Tools and Supplies

Statistics

  • 70% of artists report using various forms of brushes daily while painting.
  • 65% of painters rely on acrylic mediums due to their versatility and quick drying time.
  • Over 80% of artists feel that the quality of their tools impacts the outcome of their work.

Awareness and Budgeting

Artists should be mindful of their tool costs and the budget allocated for Supplies. Investing in high-quality tools can yield better results and save money in the long run, as they often have a longer lifespan than cheaper alternatives.

Tool Type Average Cost Investment Value
High-Quality Brush $10 – $50 Durability and performance
Professional Easel $50 – $300 Stability and workspace flexibility
Palette Knife $5 – $20 Versatility in technique

Frequently Asked Questions (FAQ)

What are the must-have tools for a beginner artist?

For beginners, essential tools include a basic set of brushes, a palette, a portable easel, paint (acrylic or watercolor), and cleaning supplies. Starting with a limited palette can also help focus on color mixing.

How can I clean my brushes properly?

Rinse brushes in warm water immediately after use. Use brush soap or mild detergent for oil paints, and ensure the bristles are reshaped into their original form before drying.

What is the benefit of using a mahl stick?

A mahl stick helps steady your hand, which is crucial for achieving precise details in your artwork.

Are expensive artist tools worth it?

While high-quality tools can be pricier, they often result in better painting experiences and outcomes. Investing in quality can benefit artists, especially in the long run.

Where can I find high-quality painting tools?

Quality painting tools can be found at local art supply stores, specialized online retailers, or through dedicated artist communities. Authentic resources such as Dick Blick provide a wide selection of tools for artists.

In summary, artist painting tools are foundational to practicing and enhancing artistic skills. Understanding the variety of available tools and their specific purposes will help artists, whether beginners or seasoned professionals, unleash their creativity effectively. Make informed choices, invest wisely, and watch your artistry flourish!

Exit mobile version