Unlock the Magic: Discover the Glaze Painting Technique for Stunning Artwork!

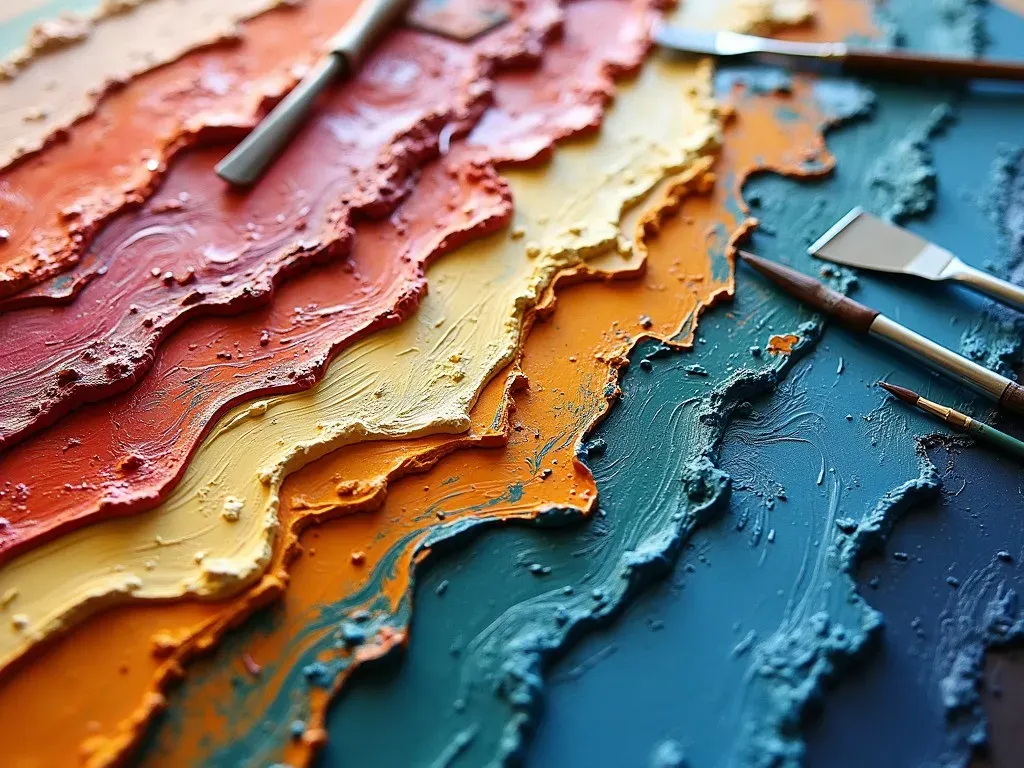
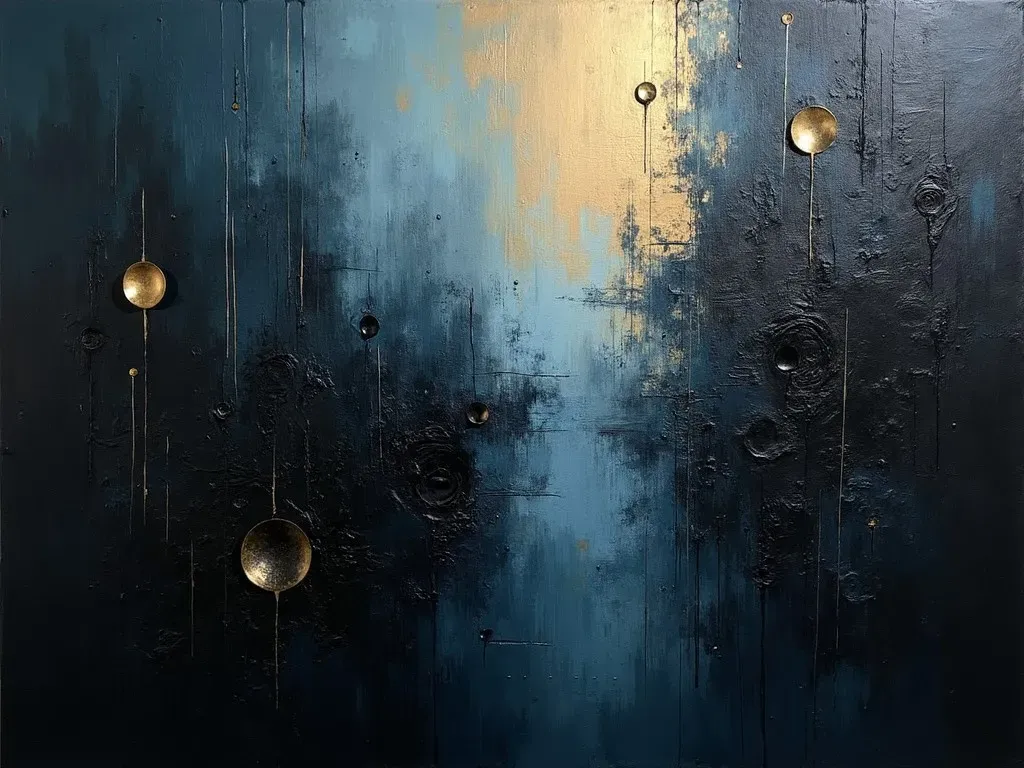
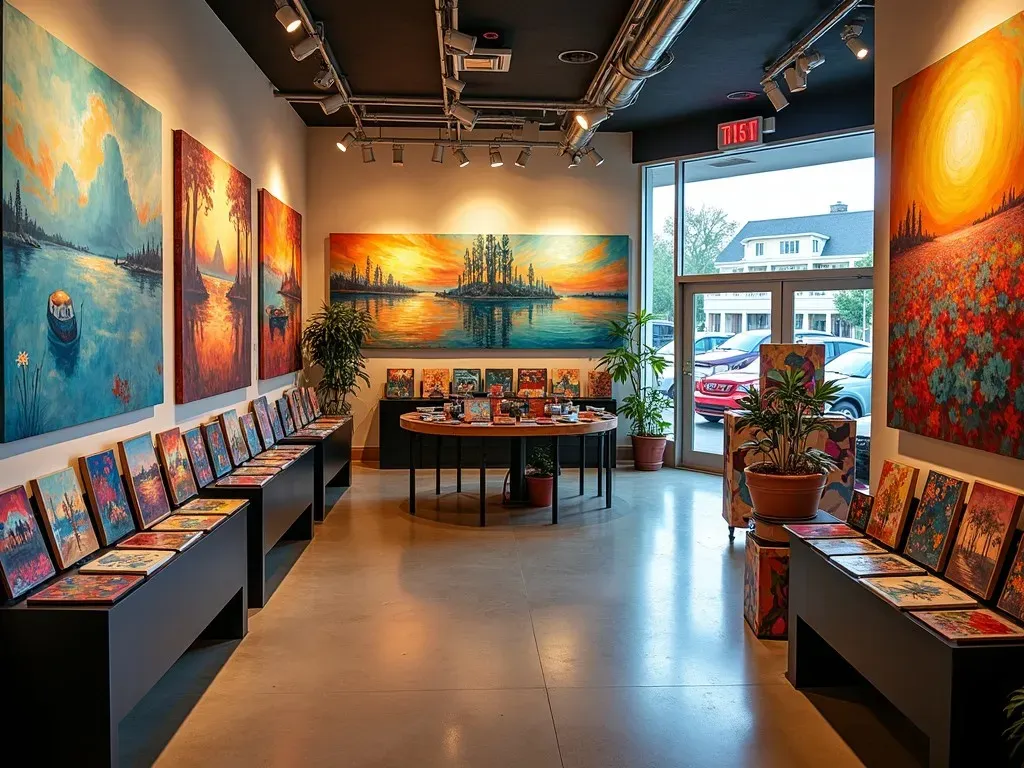
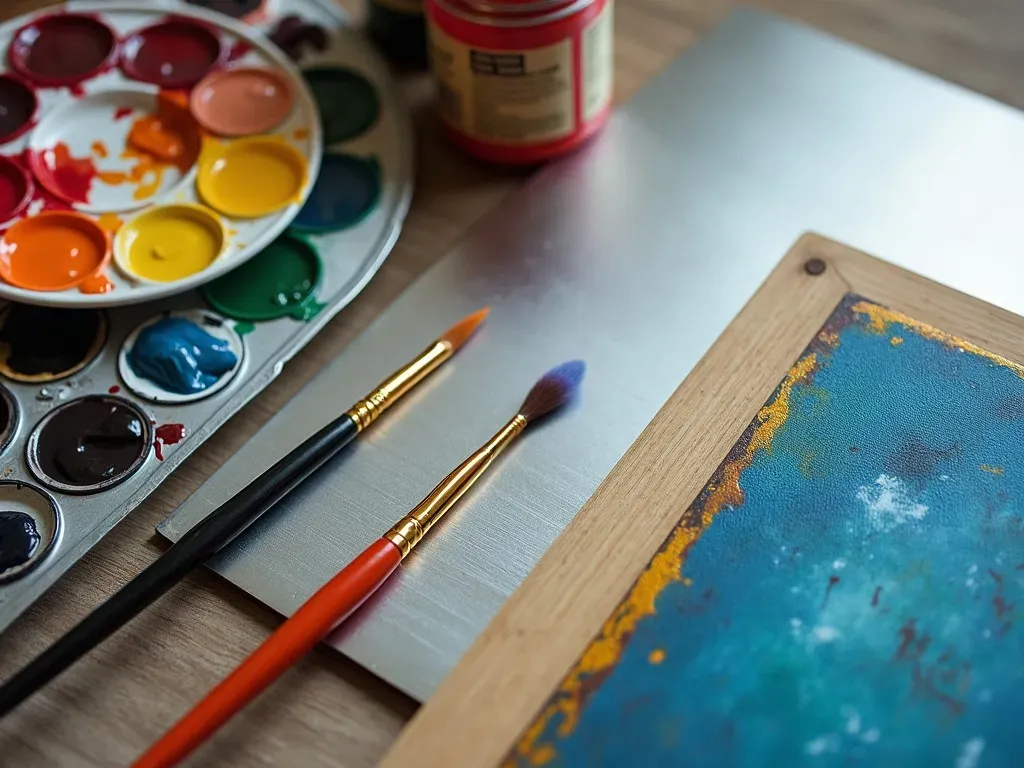
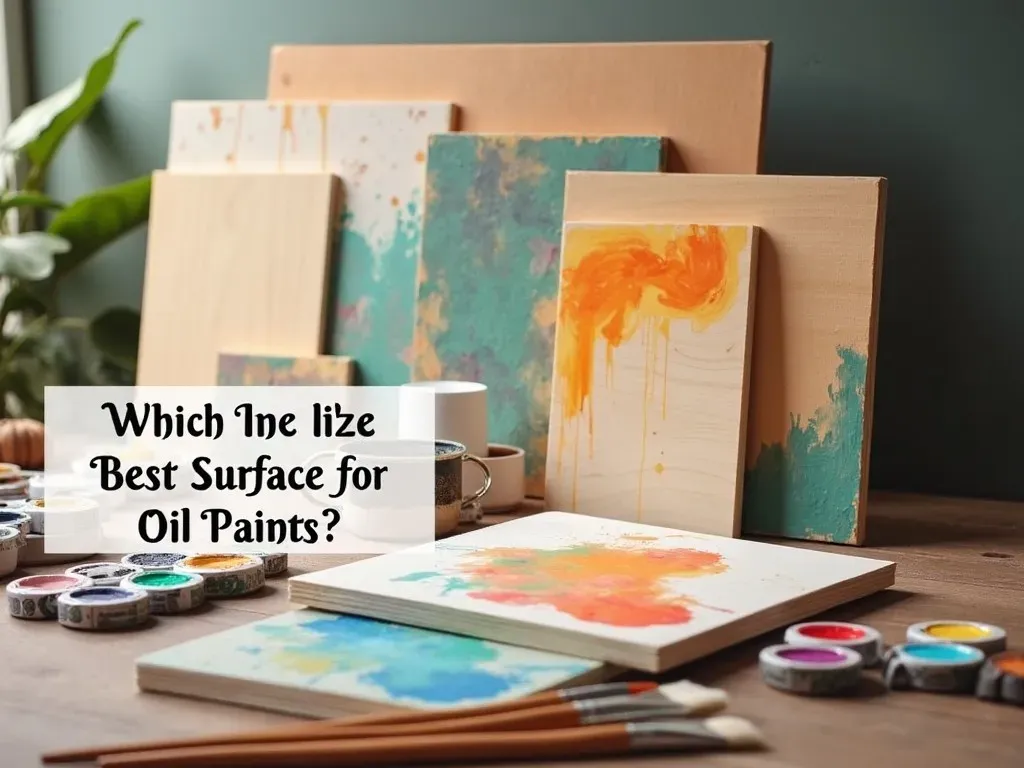
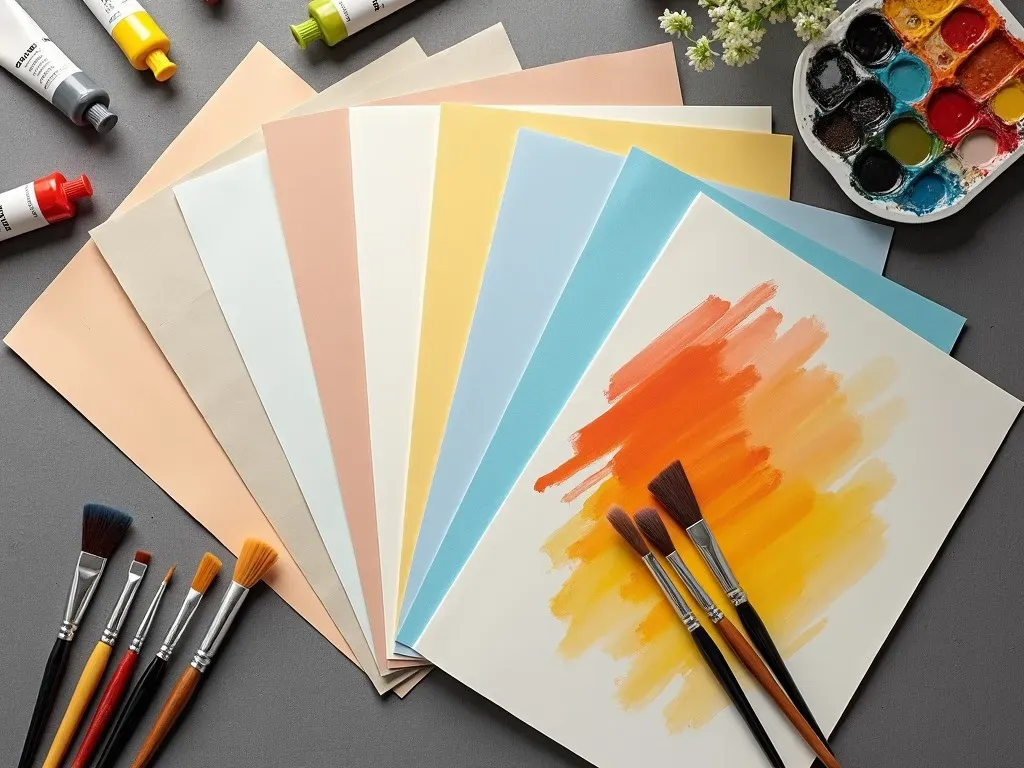
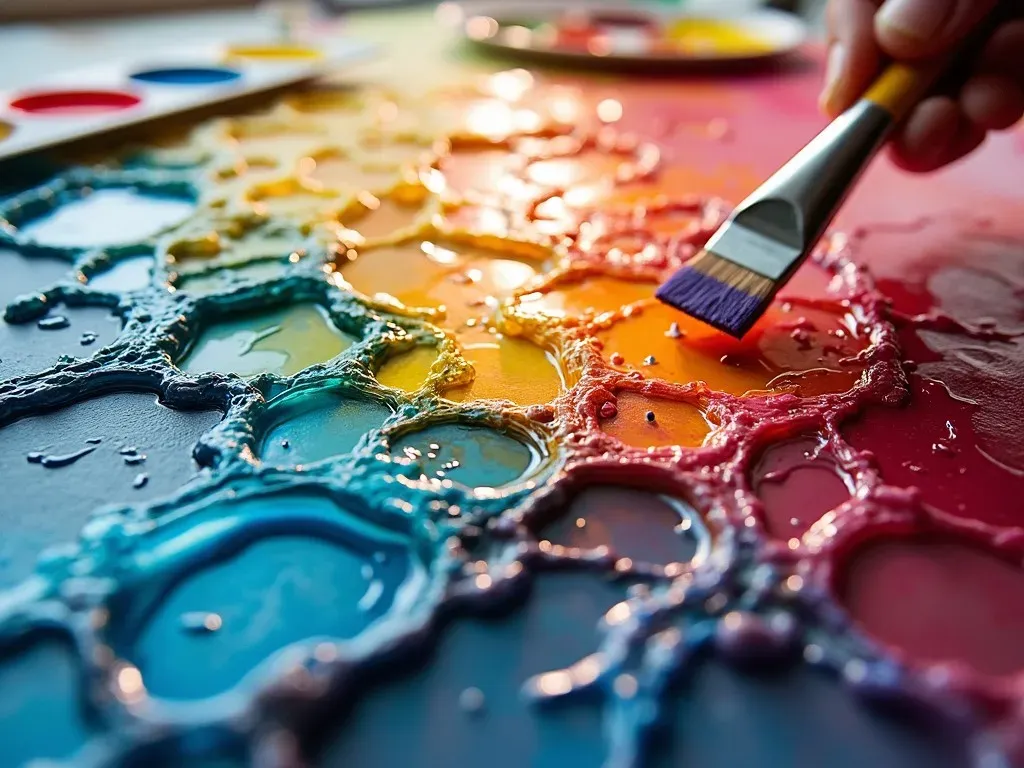
Glaze painting technique is a method where thin transparent or semi-transparent layers of paint are applied over a dried layer to modify the underlying colors and effects. This technique is prevalent among oil painters and can dramatically alter the chroma, value, hue, and texture of the surface, providing depth and luminosity to the artwork.

The glaze painting technique serves as a bridge between realism and impressionism, allowing artists to create more dynamic and engaging pieces. By layering different colors, artists can achieve nuanced tones and intricate shadows that bring their work to life. The importance of understanding this technique cannot be overstated for both amateurs and seasoned artists alike.

Understanding the Essence of Glaze Painting Technique

  • What is Glazing?
    Glazing is the process of applying a transparent or semi-transparent layer of paint over an already dried paint layer. The primary purpose of glazing is to modify the depth and character of the underlying paint, allowing for a richer visual experience.

  • Why Use Glazing?
    Glazing Techniques allow an artist to adjust the appearance of a painting without altering the original base layer drastically. This flexibility enables artists to bring out colors, create shadow effects, and introduce luminosity.

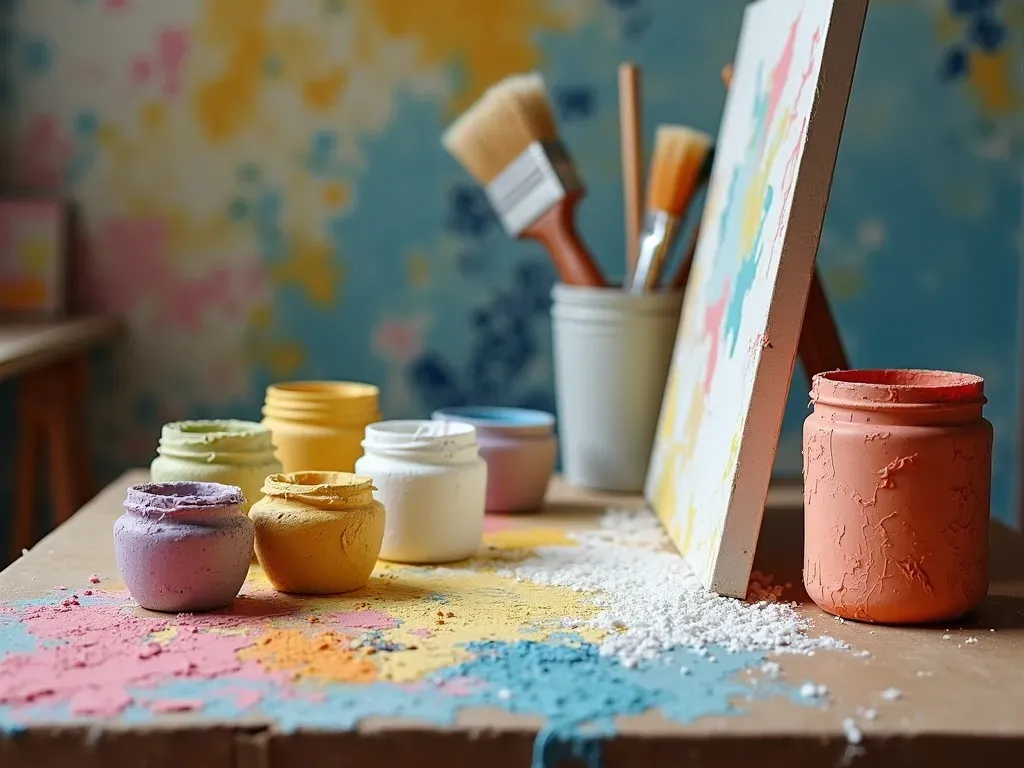
Basic Principles of Glazing

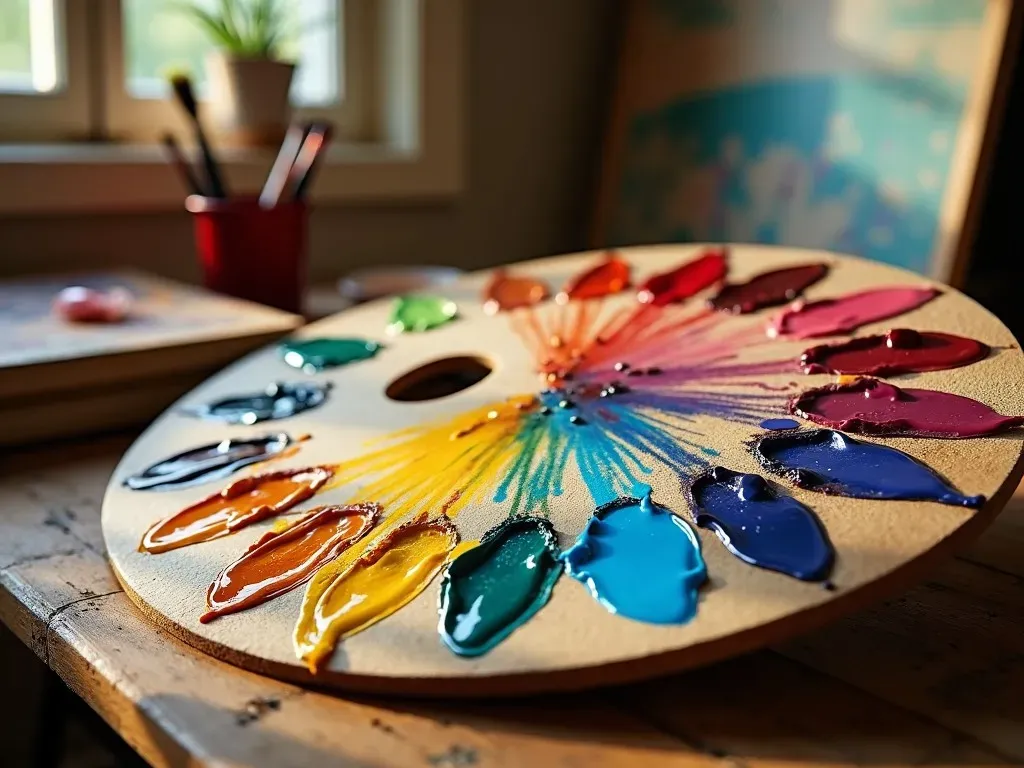
  1. Transparency: The glaze is typically composed of a high proportion of medium to pigment. The medium allows the artist to create thin, transparent layers.

  2. Layering: Multiple layers can be applied, each enhancing the previous layer. The artist should ensure that each layer dries completely before adding another to avoid mixing.

  3. Color Modification: The glaze can change the overall color of the painting without completely masking the base layer. Different combinations of pigments can create an endless range of tonal possibilities.

Table 1: Comparison of Glazing Materials

Material Characteristics Best Use
Oil Paint High viscosity, excellent blending Traditional oil glazing
Acrylic Paint Fast-drying, versatile Quick glazing techniques
Watercolor Paint Thin, fluid, easy to manipulate Subtle glazing effects
Enamel Paint Hard and glossy finish Decorative art

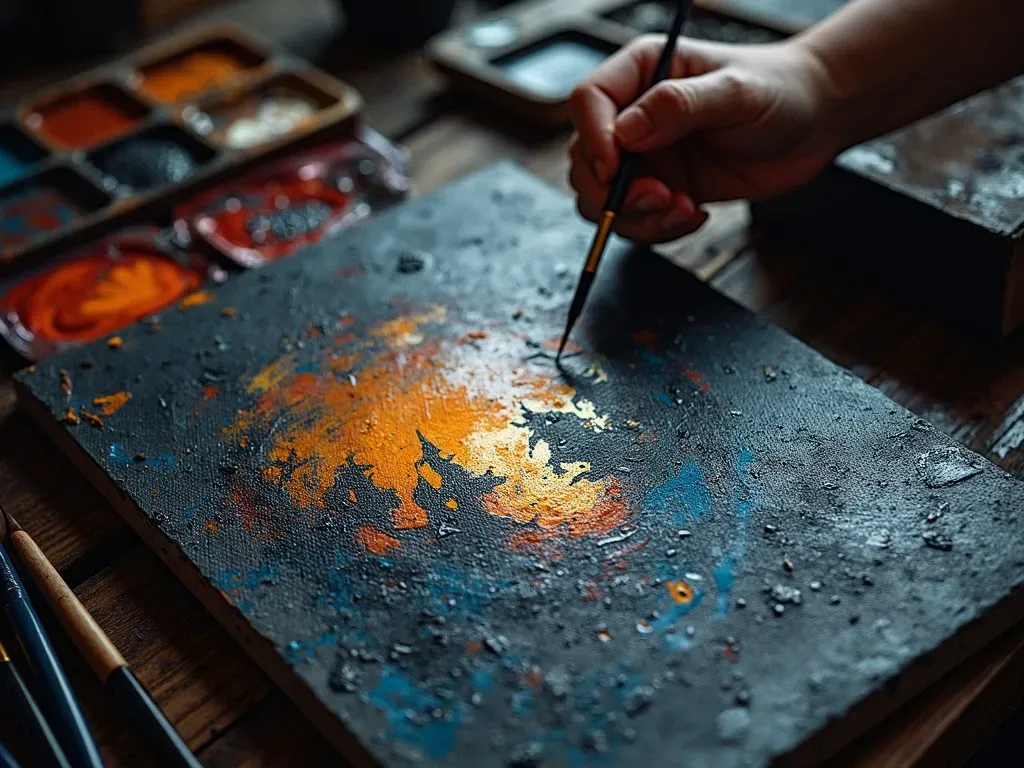
Techniques for Successful Glazing

  • The One-Pigment Glaze: This involves creating a glaze using only one pigment mixed with a medium. It’s an effective way to ensure the luminance of colors remains intact.

  • Color Shift: Mixing different pigments can shift the color of the base layer. For instance, a warm yellow glaze over a cool blue base can yield a greenish hue.

  • Scraping and Blending: Using palette knives or brushes, artists can manipulate layers of glaze for desired effects.

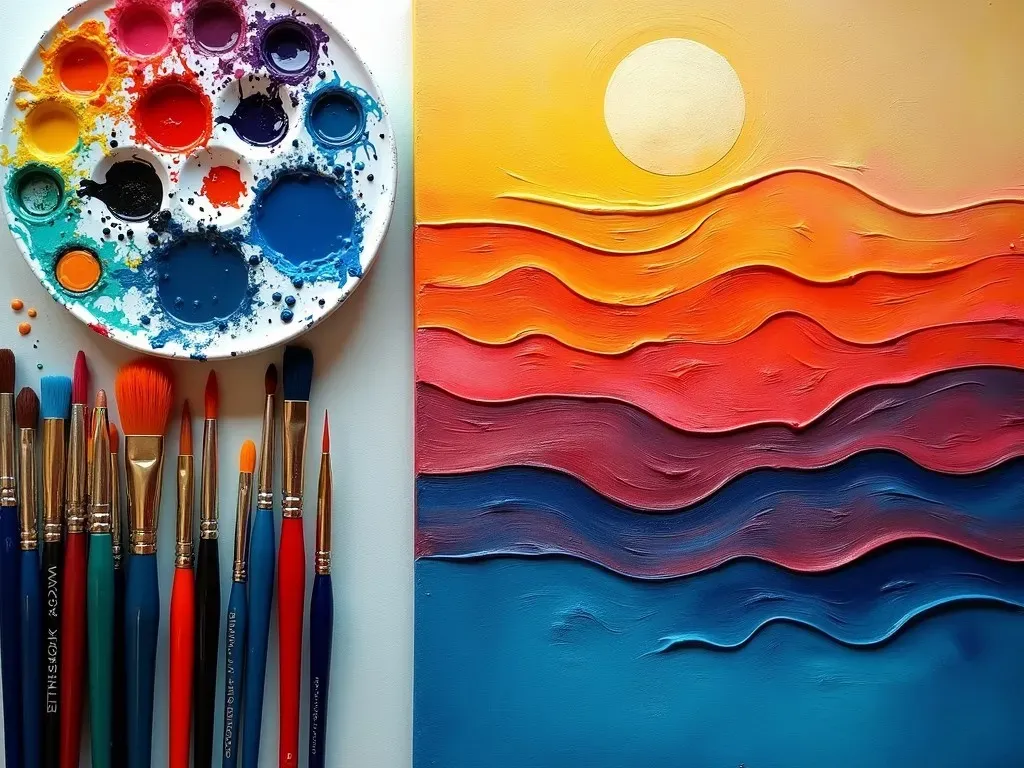
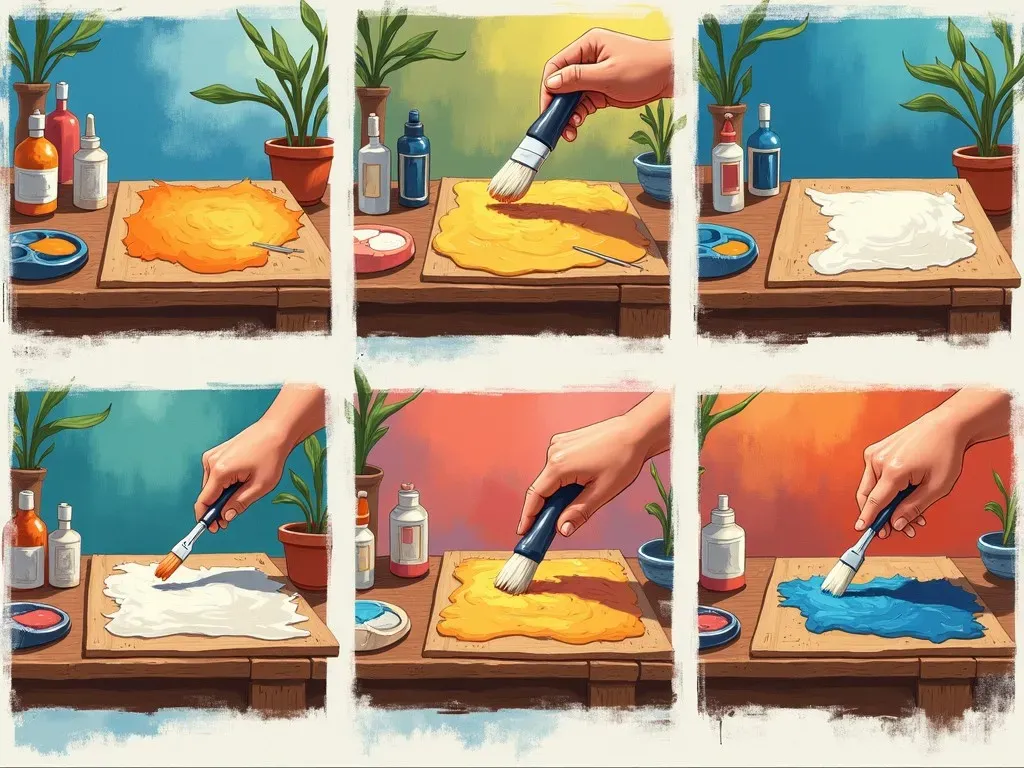
Glazing Process Step-by-Step

  1. Prepare Your Base Layer: Start with a complete and dried painting that serves as your base layer. Ensure that the surface is clean.

  2. Mix Your Glaze: Combine your chosen pigment with the painting medium to create a semi-transparent mixture.

  3. Application: Use a soft, clean brush to apply the glaze in thin, even layers.

  4. Evaluate and Adjust: After applying, step back, evaluate the effects, and decide if more layers are needed.

  5. Dry Completely: Allow each layer to dry completely before adding another to prevent mixing or muddying of colors.

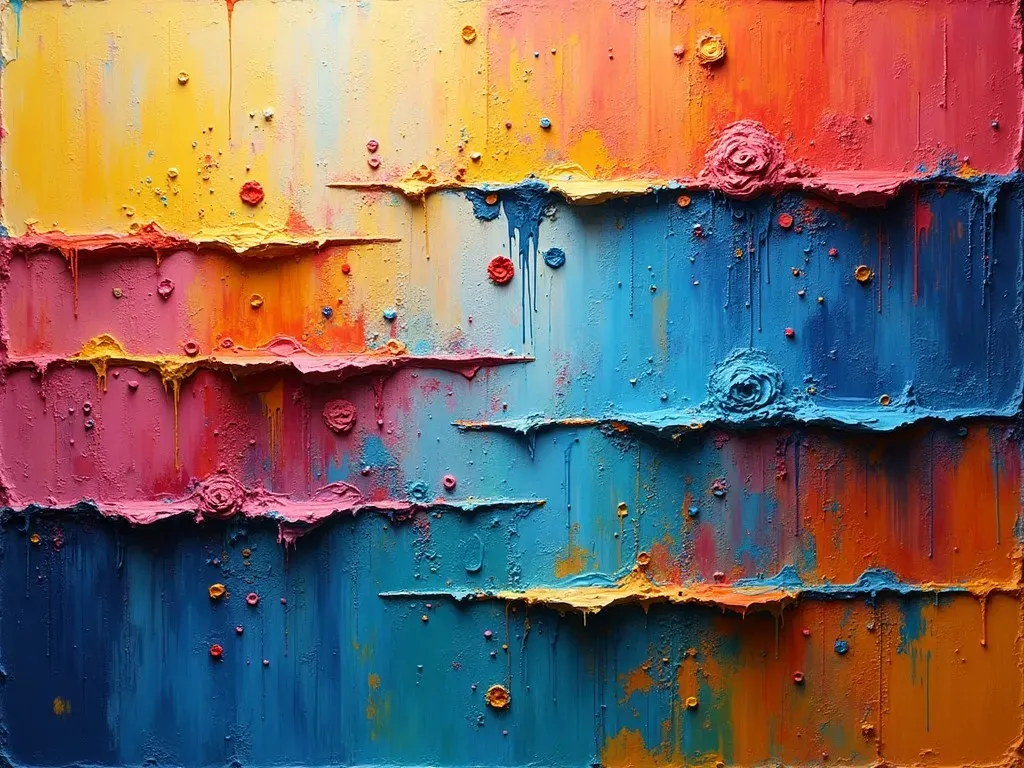
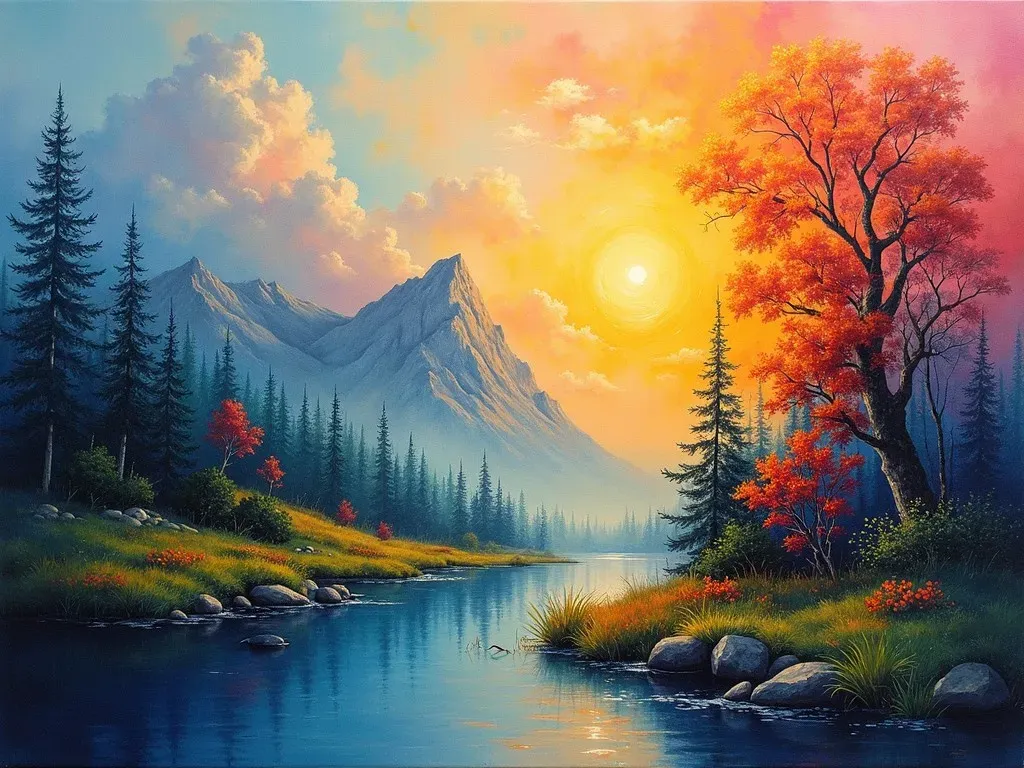
Impact of Glazing on Artworks

The glazing technique can amplify the emotional impact of an artwork. By layering colors, an artist can express feelings, themes, and narratives more vividly.

  • Luminosity and Depth: The depth that can be achieved through glazing creates a three-dimensional illusion, enhancing the viewer’s experience.

  • Subtle Tone Changes: Through glazing, subtle tonal shifts can influence the mood of the piece.

  • Rich Texture: Artists can manipulate texture using glaze, allowing for varied surfaces that catch light differently.

What Are the Challenges?

Although glazing can yield amazing results, it also comes with challenges that every artist should consider:

  • Drying Time: Oil paint takes significantly longer to dry than other media, which can be inconvenient for those looking to work quickly.

  • Unpredictability: Mixing a glaze requires careful consideration of color theory. Incorrect combinations can lead to undesirable results.

  • Layer Management: It’s crucial to manage layers effectively. Too many layers can result in a muddy appearance.

FAQ about Glaze Painting Technique

Q: What is the best medium for glazing?
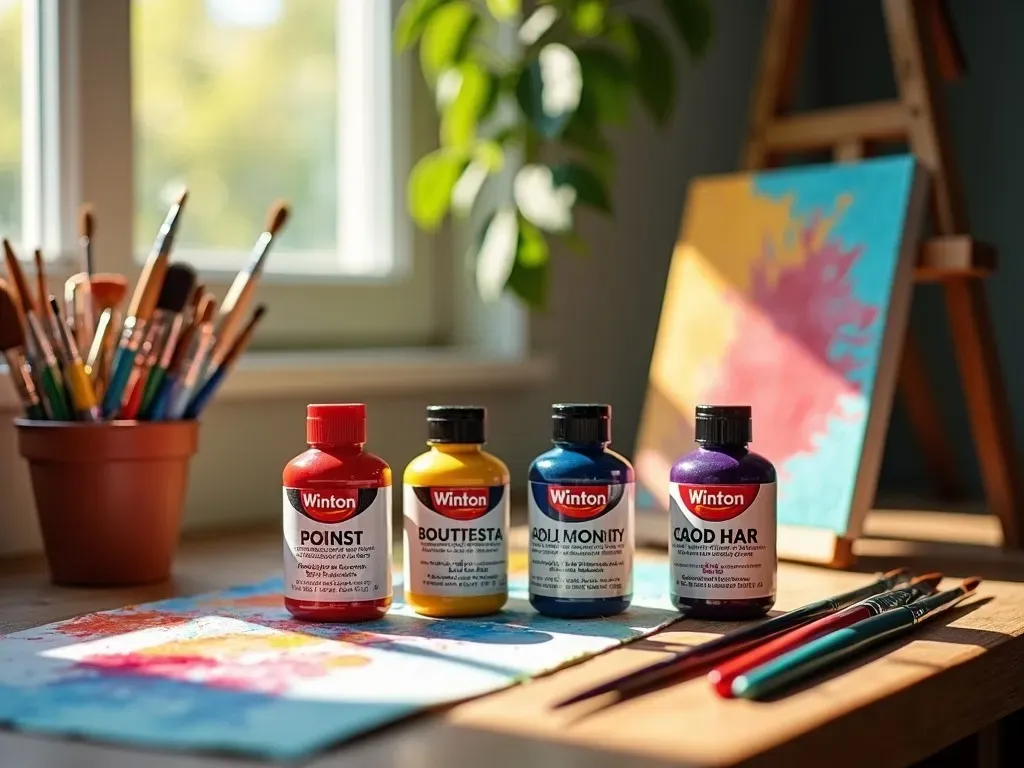
A: Linseed oil is commonly used for oil painting, whereas acrylic mediums like glazing liquid can work wonders with acrylic paints.

Q: How many layers can I apply with glazing?
A: There is no hard limit, but usually 3-5 layers achieve excellent results without overwhelming the base layer.

Q: Can I use glazing with non-oil paints?
A: Yes, glazing can be successfully applied with acrylics and watercolors as well, but techniques may vary slightly.

Q: What are some famous artists known for using glazing?
A: Historical figures such as Jan van Eyck and contemporary artists like Andrew Wyeth are renowned for their use of glazing techniques.

In summary, the glaze painting technique is a transformative art method that opens a world of possibilities for painters. Whether you’re looking to refine your craft or simply explore a new technique, glazing offers a unique challenge and an opportunity for creative expression.

For further reading on glazing techniques, consider visiting Old Holland.

References

Unleash Your Creativity with the 7 Layer Painting Technique: A Deep Dive into Layer Painting Techniques

The layer painting technique, particularly the 7 layer oil painting technique, is a fascinating approach that allows artists to create depth, texture, and vibrant detail in their artwork. This method involves applying multiple transparent and semi-transparent layers of paint, which work together to build richness and luminosity in the finished piece. Whether you’re a beginner or an experienced painter, mastering layering can elevate your artwork to new heights.

Understanding the Basics of Layer Painting

Layer painting is a fundamental technique in both oil and acrylic mediums that promotes the gradual buildup of color and texture. It can be broken down into several key principles:

  1. Transparency: Utilizing transparent paints allows the underlayers to influence the final appearance, creating effects that can’t be achieved with a single coat of paint.
  2. Drying Time: Ensuring each layer dries before applying the next is crucial for achieving desired effects. Oil paints can take longer to dry, while acrylics can dry quickly, allowing for faster layering Techniques.
  3. Building Texture: Depending on the application method, such as whether you use a brush, palette knife, or sponge, the texture can vary significantly across layers.

Key Facts About Layer Painting Techniques

Aspect Oil Paint Acrylic Paint
Drying Time Slow (days to weeks) Fast (minutes to hours)
Layering Technique Fat over lean Wet on dry
Transparency Various mediums for glazing Glazing and opaque textures
Best for Classic techniques and textures Modern, versatile applications

7 Layer Oil Painting Technique: Step-by-Step Guide

  1. Underpainting: Start with a monochromatic base to establish value. This sets the foundation for depth.
  2. First Color Layer: Apply a thin layer using a transparent color. This can include softer tones to begin shaping your subject.
  3. Second Layer: Introduce a different hue while considering complementary colors for balance.
  4. Add Opacity: Next, use more opaque colors to create focal points and add details.
  5. Glazing Layers: Use a transparent medium to layer colors that overlap. This enhances luminosity.
  6. Texturing: Incorporate various tools like a palette knife or brush techniques to build physical texture.
  7. Final Touches: Apply highlights using the most opaque colors and add additional glazes or textures as needed.

Additional Techniques for Layering

Several additional techniques can be utilized while mastering the layer painting technique:

  • Scumbling: A method where a dry brush with thin paint is used to create a hazy effect over dried paint, providing a sense of atmosphere.
  • Glazing: A technique that involves applying thin, transparent layers to modify color and create depth without altering the structure of the under layers.
  • Acrylic Painting Layering: When acrylics are used, layering can be more spontaneous since acrylics dry quickly, encouraging rapid methodical work.

Reference Video

Tools Essential for Layer Painting

Tool Purpose
Brushes For smooth application of paint
Palette Knives For creating textured and impasto effects
Sponges To add porous texture or soft edge effects
Glazing Mediums To increase transparency in layers
Rags and Water For a clean workspace and brush care

Painting Layers Technique: Advanced Approaches

The beauty of layering extends beyond just colors. Texturing through mixed media can enhance your artwork significantly. Incorporating materials such as:

  • Pastels: Can create soft edges and highlight areas.
  • Inks: Can add unexpected vibrancy.
  • Gel mediums: For thick texture applications.

Incorporating these into your layers can lead to unique artistic expressions.

Frequently Asked Questions (FAQs)

What is the key to successful layering in painting?

The critical factors for successful layering are drying time between coats, understanding color transparency, and the application technique. Patience is essential!

Can I use layering techniques with acrylic paints?

Absolutely! Acrylic paints are particularly versatile for layering due to their quick drying time. Techniques like glazing and scumbling are especially effective with acrylics.

How many layers should I use?

There’s no fixed number of layers you must adhere to. The “7 layer” method is a guideline. Depending on your composition and desired effects, you may use more or fewer layers.

What mediums enhance the layering technique?

When using oil paints, mediums such as linseed oil can enhance fluidity and transparency in layers. For acrylics, using an acrylic medium can achieve similar effects.

Where can I find more information on layering techniques?

You can explore techniques and tips from Nancy Reyner’s website for in-depth guidance on various layering processes.

With these insights and resources, diving into the world of layer painting techniques can transform your artistic process into an exploration of color depth and textural richness. Remember, practice and experimentation are key to unlocking your creative potential. Enjoy the journey!

Mastering Layering in Oil Painting: Unleash Depth and Texture Like a Pro!

Layering in oil painting refers to the technique of applying multiple layers of paint to create depth, dimension, and luminosity in a painting. This method is not only foundational to the art of oil painting but is also essential for achieving lifelike qualities and rich textures that can transform a simple canvas into a masterpiece.


Understanding the Basics of Layering in Oil Painting

Oil painting is an intricate art form that relies heavily on the technique of layering to build complex visual effects. Each layer of paint interacts with the layers beneath it, allowing artists to achieve depth, vibrancy, and a sense of realism that is difficult to replicate with other mediums.

Key oil painting techniques Involving Layering

  1. Underpainting: The first layer that sets the tone and outlines the composition. Typically done in monochrome.

  2. Blocking-In: Establishing basic shapes and values with a rough initial layer.

  3. Glazing: A thin, transparent layer of paint applied over previous dry layers that allows underlying colors to interact in compelling ways.

  4. Impasto: Applying paint thickly, often using a palette knife, which adds texture and a three-dimensional quality to the work.

Layer Technique Description Typical Use
Underpainting Monochromatic layer that defines values and composition Foundation for complex color layering
Blocking-In Basic shapes and colors are roughly established Initial layout and value setting
Glazing Thin layers of transparent paint to add depth and luminosity Enhancing vibrancy and altering colors without losing detail
Impasto Thickly applied paint for texture Creating surface interest and depth

The Importance of Layering in Oil Painting

In the realm of oil painting, the concept of layering carries immense significance. It serves various purposes that enhance the quality and emotional impact of an artwork.

Benefits of Layering

  1. Depth and Dimension: Layering adds both physical and visual depth, enhancing the three-dimensionality of the painting. Each layer engages with the light differently, leading to a dynamic interplay that breathes life into the work.

  2. Color Richness: By layering colors, artists can achieve stunningly rich and complex hues that would be difficult to create with a single application.

  3. Texture Variation: Different Techniques like impasto provide a tactile experience, enriching the overall aesthetic appeal of the piece.

  4. Optical Effects: Layering allows artists to exploit optical phenomena like glazing to create effects that change based on light dynamics.

Layering Techniques Explained

  • Block-In Method: This initial covering is essential for establishing the fundamental composition of the artwork. Artists often use a large brush for this step, working quickly to lay down significant color areas without meticulous detail.

  • Glazing: One of the most sophisticated techniques of layering, glazing involves applying transparent layers of color over a dried base. This method is ideal for altering existing colors, enhancing brightness, and adding depth while keeping the underlying forms visible.

  • Impasto Technique: This technique creates a striking visual and tactile quality. Artists can use palette knives or the tips of their brushes to add thick, textured layers of paint, which catch and reflect light uniquely.

Layering Process: Step-by-Step

  1. Preparation: Start with a well-oiled canvas. A gesso preparation layer helps with paint adherence and prevents oil absorption.

  2. Initial Layer: Apply the underpainting using a monochromatic color scheme to map out your shapes.

  3. Blocking-In Colors: Use broader, opaque colors to fill in the main forms and establish your values.

  4. Building Layers: Gradually add layers using glazing or impasto. Ensure that each layer dries thoroughly before adding the next to maintain paint integrity.

  5. Final Touches: Once the painting reaches a desired saturation and texture, the final details can be added for depth and interest.


Reference Video

Tips for Effective Layering in Oil Painting

  1. Adhere to the Fat Over Lean Rule: Always make sure each subsequent layer of paint contains more oil (or is ‘fatter’) than the previous layer. This prevents cracking and ensures a flexible, durable finish.

  2. Experiment with Mediums: Different oil mediums can alter the texture, drying time, and finish. Explore various options like Liquin or stand oil to find those that best suit your artistic goals.

  3. Use the Right Tools: Invest in high-quality brushes and palette knives for effective layering. Different brushes can create varying textures; use them accordingly.

  4. Work Slowly: Patience is key. Each layer may take time to dry before you can assess how to enhance it further.

References

For more detailed techniques and step-by-step guides, check out Art Ignition’s comprehensive Layering Oil Paint Guide.


FAQs About Layering in Oil Painting

Q: How long should I let each layer dry before applying the next?

A: It typically varies by the thickness of the paint and the environment, but a general rule is to allow at least 24 hours of drying time for thinner layers.

Q: Can I paint over an existing layer without waiting for it to dry?

A: While some techniques like wet-on-wet allow this, it’s generally advisable to let the paint dry to prevent mixing and mudding of colors.

Q: Do I need to use mediums for glazing?

A: While not mandatory, mediums generally improve transparency and flow, which is ideal for glazing techniques.

Q: What are some good colors to start with for glazing?

A: Common glazing colors include Transparent Red Oxide, Cadmium Yellow, and Ultramarine Blue due to their ability to create rich combinations.

Q: Is glazing suitable for every painting style?

A: Glazing works well with realistic, impressionistic, and even abstract styles; however, for heavy textures, consider complementary techniques.


Feel free to insert images at the appropriate locations (e.g., ““) to enhance the visual appeal and instructional value of the content!

Unlock Your Creativity: The Essential Guide to Gesso for Oil Painting!

Gesso for oil painting is an indispensable product that every artist should familiarize themselves with when preparing a canvas or board for their next masterpiece.

What Is Gesso and Why Is It Important?

Gesso is a mixture of substances that traditionally includes chalk, gypsum, and a binder. It serves as a primer on canvas, boards, or paper, preparing the surface for painting. This preparation is crucial for the longevity and vibrancy of your artwork. Gesso provides a smooth surface that allows oil paint to adhere better, preventing moisture from the paint from damaging the underlying canvas.

Types of Gesso

There are various types of gesso available, and understanding these differences can help you choose the best product for your oil painting projects. Below are the primary types of gesso used by artists:

Type of Gesso Description
Acrylic Gesso Made with acrylic polymer; flexible and durable. Best for non-absorbent surfaces.
Traditional Gesso Made from chalk or plaster and animal glue; provides a rigid surface. Preferred by classical painters.
Clear Gesso Allows the canvas color to show through; great for mixed media.
Colored Gesso Comes in various colors; useful for painting with transparent or opaque layers.

Best Practices for Applying Gesso

There are standard procedures for applying gesso to ensure optimal results in oil painting. Adhering to these practices will undoubtedly enhance your artwork’s overall quality.

  1. Prepare Your Canvas:

    • Start with a clean, dry canvas. Use a damp cloth to remove any dust or debris before applying gesso. This will ensure a smooth finish.
  2. Choose the Right Brush:

    • Use a wide, flat brush to apply gesso evenly. A good choice is a 2-4 inch brush which allows you to cover larger areas quickly.
  3. Apply Multiple Coats:

    • For the best results, apply at least two to three coats of gesso. Allow each coat to dry for a few hours or overnight, depending on humidity levels.
  4. Sand Between Coats:

    • If you prefer a smoother surface for oil painting, lightly sand between applications using fine-grit sandpaper. This will eliminate any texture left by the brush and create a glass-like finish.
  5. Final Drying:

    • Ensure you let the last coat dry thoroughly. A good rule of thumb is to let it dry for 24 hours before starting your painting.

FAQ About Gesso for Oil Painting

1. Do I need to gesso a pre-primed canvas?

No, you don’t have to. However, many artists still apply an additional coat of gesso to enhance the surface’s properties and ensure that the paint adheres better.

2. Is there a difference between oil gesso and acrylic gesso?

Yes, oil gesso is more absorbent and flexible and can be used with oil paints, while acrylic gesso is generally more suitable for acrylic and mixed media, offering a different texture and finish.

3. Can I make my own gesso?

Absolutely! A simple recipe involves combining white acrylic paint with calcium carbonate or plaster. This DIY gesso can be customized to your preferred texture.

4. What is the best gesso for oil painting?

The best gesso can vary based on the artist’s preference, but traditional gesso is often favored for its strong adherence properties, while acrylic gesso is popular for its versatility and ease of use.

Gesso Application Techniques

There are several Techniques that you can consider when applying gesso for oil painting. This section provides an overview of various methods to optimize the priming process.

1. Brushing Techniques:

  • Use horizontal swipes for the first coat to create a base layer.
  • For subsequent coats, use vertical strokes for a different texture and depth.

2. Sponging:

  • For artists looking for a unique texture, you can use a sponge to apply gesso unevenly. This method can create an organic feel to the primed surface.

3. Troweling:

  • Use a putty knife or a palette knife to apply gesso in thick layers, engaging in a more sculptural method. This is useful if you want to create textured patterns on the canvas.

Understanding the Durability of Gesso

It is essential to understand that gesso does not just prepare a surface; it also interacts with the oil paint in unique ways. Here’s what you need to keep in mind:

  • Flexibility vs. Rigidity: Traditional gesso provides a rigid surface that can crack over time. On the other hand, acrylic gesso is more flexible, making it less susceptible to damage from substrate movements.
  • Color Retention: Gesso sets the stage for your color’s vibrancy. The brighter the gesso, the more luminous your colors will appear.

Gesso Storage and Shelf Life

  • Storage: Keep your gesso in a cool, dry place away from direct sunlight. Seal it tightly to prevent drying out.
  • Shelf Life: Generally, gesso has a shelf life of 1-2 years if stored properly. Always check for any consistency changes before application.

Conclusion

In your journey as an artist, understanding and utilizing gesso for oil painting is pivotal. It’s the key to preparing a durable, versatile surface that showcases your creative vision. Incorporating the right techniques and practices will not only enhance the longevity of your artwork but also give you the best experience while creating.

For more detailed guidance, check out this comprehensive resource: The Ultimate Guide to Choosing the Perfect Gesso for Oil Painting.

By following the right procedure and choosing suitable materials, you can elevate your oil painting journey and unleash your full artistic potential!

Reference Video

Discover the Beauty of Oil Painting Dark: Transform Your Art with Shadow and Depth!

Oil painting dark can be an incredibly rewarding technique, allowing artists to explore rich, complex color palettes and invoke deep emotional responses through their work. By understanding how to master dark tones, layers, and textures, artists can create stunning pieces that captivate viewers and showcase their skills.

Understanding the Essence of Dark Oil Painting

Dark oil paintings often utilize a limited palette of deep, rich colors to emphasize shadows and light. This approach can add drama and intensity to artworks, evoking a sense of mystery or melancholy. The choices made in selecting colors and Techniques directly impact the final effect of the piece.

Artists can either start their work by applying dark colors to set the mood or layer lighter colors on top. The choice largely depends on individual style and the desired outcome. When painting dark to light, it is essential to have a well-prepared base that can balance the intensity of the paint being used.

The Foundation of Dark Oil Painting: Base Colors

A common misconception in oil painting is that dark pigments should always be the first choice. However, achieving depth in dark oil paintings relies on the effective use of base colors that complement the work’s overall tone. Some popular base colors used in oil painting dark include:

Base Color Description
Burnt Umber A warm, deep brown great for shadows
Raw Umber A cooler, neutral brown for balance
Payne’s Grey A versatile dark blue-gray
Dioxazine Purple A vibrant, deep purple for richness

Structuring a painting around these base colors creates a foundation that allows darker tones to feel more grounded.

Techniques for Deepening Darkness

When engaging with oil painting dark, a few techniques stand out in enhancing shadow and depth:

  1. Glazing: This involves adding transparent layers of color over dry paint. Glazing allows an artist to modify the existing hues, giving them greater depth and luminosity.
  2. Layering: Begin with dark colors, and as the painting evolves, layer lighter hues to create contrast and highlights.
  3. Impasto: This technique uses thick applications of paint, resulting in texture that can provide depth and interest to the dark areas of the painting.

Complementary Colors to Dark Tones

While dark colors dominate the canvas, employing complementary colors can enhance the overall richness of the painting. For instance:

  • Yellow: Bright yellows against deep browns or blacks can create striking contrasts.
  • Blues: Pairing dark hues with cooler shades of blue can introduce balance and tranquility.
  • Whites: Accents of white or lighter tones can highlight essential features of the artwork.

By understanding complementary relationships, artists can create a dynamic interplay between dark and light that enhances visual interest.

Common Challenges in Dark Oil Painting

Despite its allure, mastering oil painting dark poses several challenges for artists. Among these, an incorrect oil-to-paint ratio can dull the appearance of dark tones. Below are some common challenges and approaches to address them:

Challenge Solution
Dull Finish Adjust the oil and solvent content in paint
Loss of Detail Ensure adequate lighting while painting
Over-mixing of Dark Colors Utilize a limited palette to maintain vibrancy

By anticipating these challenges and preparing accordingly, artists can eliminate frustration and focus on the joys of creation.

Oil Painting Dark: Color Mixing Techniques

Mixing dark colors effectively is crucial to achieving a compelling image:

Dark Color Primer:

Here’s a basic method of mixing colors to create dark shades:

  1. Start with a base – for instance, Burnt Umber.
  2. Gradually add a smaller amount of Dioxazine Purple for richness.
  3. Introduce Rhodes Blue or Black as needed until a desirable depth is achieved.

Tips for Painting Dark to Light

Different approaches can be employed to effectively transition from dark to light within a painting:

  1. Starting with Dark Backgrounds: Fill the canvas with dark hues, allowing light colors to be introduced later.
  2. Focus on Values: Ensure a good range of values, paying attention to how dark areas interact with the lighter parts of the artwork.

Begin by sketching the primary composition lightly with charcoal or a thinned color mix, then proceed to fill in dark shadows meticulously.

Famous Dark Paintings: Inspiration for Artists

Studying renowned artworks can provide key insights into the dark oil painting technique. Some famous dark paintings include:

  1. "The Night Watch" by Rembrandt – A masterclass in contrasting light and shadow.
  2. "The Nightmare" by Henry Fuseli – An exploration of dream-like darkness and its emotional resonance.
  3. "The Adoration of the Mystic Lamb" by Jan van Eyck – Showcases intricate use of dark hues to frame the divine light.

FAQs

What are the best colors for dark oil paintings?
The best colors include Burnt Umber, Raw Umber, Payne’s Grey, and Dioxazine Purple, allowing for a rich palette that enhances depth.

How do I prevent my dark oil painting from becoming dull?
Maintain the correct ratio of oil, solvent, and pigment to preserve brightness, and use glazing to enhance the vibrancy of layered colors.

Can I paint dark to light effectively?
Yes, many artists prefer starting with dark backgrounds. Establishing dark areas first creates a striking contrast when introducing lighter colors.

For further exploration, check out this informative piece on How to Go from Dark to Light in Oil Painting.

oil painting techniques">

By embracing the exploration of dark tones in oil painting, artists can deepen their understanding of color dynamics while enhancing their creative expression. Whether it’s through layering or glazing techniques, the path toward mastering the darker side of oil painting is one of profound artistic discovery.

Reference Video

Unlock Your Creativity: Essential Oil Painting Videos You Can’t Miss!

When it comes to exploring the vibrant world of oil painting, few resources compare to the wealth of oil painting videos available online. These instructional videos can transform beginners into skilled artists, offering countless Techniques, tips, and tricks to master the art of oil painting. Whether you’re just starting or looking to hone your skills, these videos can be a treasure trove of knowledge and Inspiration.

Types of Oil Painting Videos

Oil painting videos come in various forms catering to different levels of expertise and styles. Here’s a brief overview:

Type Description
Tutorial Videos Step-by-step guides on specific techniques or themes.
Demonstration Videos Artists showcase their process for a particular painting.
Time-lapse Videos Fast-forward documentation of the painting process.
Theory and Techniques Videos In-depth discussions about color theory, brushwork, and more.

Where to Find Quality Oil Painting Videos

Here is a list of valuable resources for excellent oil painting videos that can elevate your painting skills:

  1. KevinOilPainting – YouTube: Kevin uploads new videos weekly that teach you to paint landscapes, seascapes, and more.
  2. Concept Art Empire: This site offers a compilation of over 40 free oil painting video tutorials that span the basics to advanced techniques.
  3. Jerry’s Artarama: A repository for numerous free art instruction videos focused on oil, perfect for both novices and seasoned painters.

Getting Started with Oleo Painting: Essential Equipment

To dive into the immersive universe of oil painting videos, starting with the right equipment is crucial. Here’s a list of basic Supplies you’ll need:

Item Purpose
Oil Paints The main medium used for painting.
Brushes Different sizes and shapes for various strokes.
Palette A surface for mixing oils and colors.
Canvas or Canvas Board The surface for your artwork.
Thinner For cleaning brushes and thinning paint.
Palette Knife For mixing paints and creating texture.

oil painting supplies">

Techniques Explored in Oil Painting Videos

Beginners can find a wealth of smooth transitions from basic techniques to more advanced styles by exploring diverse oil painting videos. Below are several commonly taught techniques through these mediums:

1. Wet-on-Wet Painting

This technique allows you to apply fresh paint onto wet paint, creating soft, smooth transitions. Popularized by Bob Ross, it’s ideal for landscapes and skies.

2. Glazing

Glazing involves applying a transparent layer of paint over a dried layer, creating rich colors and depth.

3. Impasto

This technique uses thick applications of paint to create texture and a three-dimensional effect on the canvas.

4. Scumbling

Scumbling is a technique where a dry, wash-like layer of paint is brushed over a dry underlayer, creating an effect that adds vibrancy and texture.

Popular Oil Painting Tutorials on YouTube

YouTube is filled with fantastic oil painting tutorials that can cater to various skill levels. Here’s a list of highly regarded channels:

Channel Name Description
Patrick Connors Offers in-depth tutorials focusing on various oil painting techniques.
Angela Anderson Provides beginner-friendly step-by-step painting videos.
Bob Ross Famous for his calming tutorials and detailed landscape paintings.
Mike Thompson Specializes in portrait painting and realism techniques.

Must-Watch Videos for Beginners and Advanced Painters

Tips for Maximizing Your Learning from Oil Painting Videos

  1. Practice Regularly: Consistent practice is key to mastering oil painting techniques.
  2. Take Notes: Jotting down techniques or tips from videos can help with retention.
  3. Watch Actively: Instead of passively watching, engage with the content by following along and pausing as needed.
  4. Experiment: Don’t be afraid to try new styles and techniques beyond what you learn in videos.

Q&A Section

Q1: Are oil painting videos suitable for beginners?
A1: Absolutely! There are numerous beginner-oriented videos that start from the fundamentals and gradually advance to complex techniques.

Q2: What should I focus on first as a novice?
A2: Start with the basics like understanding materials, color mixing, and creating simple compositions.

Q3: Can I learn different styles of painting through these videos?
A3: Yes, many artists share diverse styles, including realist, impressionist, and abstract techniques in their videos.

Q4: How do I practice what I learn from the videos?
A4: Choose a specific video tutorial, gather the necessary supplies, and follow the steps while incorporating your own creative twists.

Conclusion

Oil painting videos offer an efficient and enjoyable way to drop into the rich world of oil painting. Through these dynamic resources, budding and experienced artists alike can expand their skills, unleash their creativity, and embrace the vibrant spectrum of oil painting. Whether exploring techniques, learning new styles, or seeking inspiration, there’s something for everyone in the realm of oil painting videos!

Discover the Vibrancy of Winton Oil Paint: Your Go-To Choice for Artistic Expression!

Winton Oil Paint, a premium offering from Winsor & Newton, is known for its stunning color quality and affordability, making it an ideal choice for both amateur and professional artists. With a diverse palette of 55 brilliant hues, Winton Oil Colors are made from fine art pigments and offer a smooth consistency that allows for excellent mixing and layering capabilities.


Why Winton Oil Paint Stands Out

When choosing the right oil paint, artists often navigate the delicate balance between quality and cost. Winton Oil Paint provides an impressive solution—it offers the quality of professional-grade oil paints at a price that both students and experienced artists can appreciate. The range works wonderfully for artists who require larger volumes of paint, making it a staple in many studios worldwide.

Key Features of Winton Oil Paint

  • Affordability: Competitively priced, making fine art accessible.
  • Wide Color Range: 55 colors to choose from, allowing endless creative expression.
  • Quality Pigments: Made with fine art pigments ensuring vibrant, lightfast colors.
  • Ease of Use: Designed for easy mixing and application.
  • Consistent Texture: Slightly stiffer than traditional oils, suitable for various Techniques.

Quick Facts:

Feature Details
Brand Winsor & Newton
Color Range 55 Colors
Tube Sizes 21ml, 37ml, and larger options
Ideal For Students, Amateurs, Professionals
Mixing Capability Excellent
Consistency Uniform & stiffer than Artists’ range

Expanding Your Color Palette: Key Winton Oil Colors

The Winton Oil Paint line features a rich selection of colors that every artist should consider incorporating into their work. Here’s a quick overview of some popular hues:

Most Popular Winton Colors:

Color Name Color Code Primary Use
Titanium White 101 Mixing, highlights
Cadmium Yellow Hue 107 Brightening and warm highlights
Permanent Alizarin Crimson 112 Deep red tones
French Ultramarine 130 Rich blue skies
Viridian Hue 178 Fresh greens

Recommended Color Sets

Investing in a color set is a great way to start with Winton Oil Paint. Here are some popular sets to consider:

  • Winton Oil Color Introductory Set: Contains vibrant, essential colors in 21ml tubes.
  • Professional Color Set: Includes advanced hues perfect for experienced artists looking for variety.

Tips for Working with Winton Oil Paint

Whether you are a beginner or an experienced artist, using Winton Oil Paint can unlock new levels of creativity. Here are some tips to make the most of your painting experience:

  1. Prepare Your Workspace: Ensure a well-ventilated area and gather all necessary tools—brushes, palettes, and mediums.
  2. Experiment with Mixing: Winton’s consistency allows you to mix colors effectively. Start with a small amount of paint to test blending.
  3. Use Quality Tools: Pair with Winton-specific brushes and palettes for the best results.
  4. Layer Your Paint: Start with thin layers before moving to thicker applications to create depth and texture.
  5. Keep Your Paints Sealed: Proper storage in a cool, dry place will prolong the life of your oil paints.

Additional Painting Resources

For more tips and tutorials on using Winton Oil Paint effectively, visit Winsor & Newton for detailed information on techniques and resources.

Frequently Asked Questions

What is the difference between Winton and Artist Oil Color?

Winton Oil Colors are generally more affordable and designed for artists who use larger quantities, while the Artist Oil Colors offer a higher pigment concentration for professionals seeking unparalleled intensity and versatility.

How can I clean my brushes after using Winton Oil Paint?

Brushes can be cleaned with a suitable solvent such as turpentine or mineral spirits. Make sure to wash them thoroughly with soap and water afterward.

Are Winton Oil Colors water-mixable?

No, Winton Oil Colors are traditional oil paints and require solvents for thinning and cleaning. However, Winsor & Newton does offer water-mixable oil paints in a different range.

Can Winton Oil Colors be used for professional work?

Absolutely! While Winton is often marketed for students and amateur artists, many professionals use it for large paint applications, offering beautiful results.

Conclusion

Winton Oil Paint is an exemplary choice for artists seeking quality and affordability. With a wide array of colors and user-friendly properties, it’s no wonder that it remains a favorite among many creatives. Whether you’re just starting or enhancing your professional palette, Winton Oil Paint offers possibilities limited only by your imagination.

Explore the vibrant world of Winton Oil Paint today—your canvas awaits!

Reference Video

Unlock Your Inner Artist: A Comprehensive Guide to Oil Painting for Beginners!

Oil painting is a painting method involving the procedure of painting with pigments and using drying oil as the binder. For centuries, it has been the preferred technique for creating artistic works on surfaces like canvas, wood panels, or copper. This guide will give you everything you need to know about oil painting, with tips and resources designed specifically for beginners!

Understanding Oil Painting

Oil paint is a medium comprised of colored pigments combined with a drying oil, which acts as a binding agent. The unique properties of oil paint allow for greater flexibility, richer colors, and a diversity of applications, making it a favorite among many famous artists throughout history. A few notable aspects of oil painting include:

  • Drying Time: Oil paints take a longer time to dry compared to acrylics, allowing artists to blend and manipulate the paint for extended periods.
  • Color Depth: Oil paints generally offer a richer color saturation and a wide range of mixing possibilities.

Key Components

Before diving into Techniques, it’s essential to familiarize yourself with the materials and tools available for oil painting.

Essential Supplies for Oil Painting:

Item Description
Oil Paints Available in tubes or jars, with various colors.
Brushes Different shapes and sizes like flats, rounds, and filbert.
Canvas Pre-stretched canvases or canvas boards.
Palette Used for mixing colors; can be wooden or glass.
Palette Knives Useful for mixing paints and applying texture.
Mediums To alter the viscosity and drying time of the paint (linseed oil, turpentine, etc.).
Rags/Towels For cleaning brushes and wiping your hands.
Easel To hold your canvas at a comfortable angle.

Facts, Figures, and Resources

  1. Popularity of Oil Painting: Oil painting has found a resurgence in popularity in recent years, especially among hobbyists and art students. According to a 2020 Arts Education survey, 45% of art students preferred oil painting over other mediums.

  2. History: The use of oil-based pigments dates back to the 7th century. However, its widespread adoption is primarily credited to the Northern Renaissance artists, such as Jan van Eyck.

  3. Artists: Renowned oil painters include Leonardo da Vinci, Vincent van Gogh, claude monet, and more contemporary figures like Gerhard Richter.

For a more in-depth guide on getting started with oil painting, visit Draw Paint Academy.

Basic Techniques for Beginners

1. Color Mixing

Understanding how to mix colors will be vital to your oil painting journey. Experiment with primary colors (red, blue, yellow) to create secondary colors (green, orange, purple). Here’s a simple color mixing guide:

Primary Color Mixed With Resulting Color
Red Yellow Orange
Yellow Blue Green
Blue Red Purple

2. Brush Techniques

In oil painting, different brush techniques will yield various effects. Here are some common ones you should try:

  • Dry Brush: Using a small amount of paint, create textured effects and fine details.
  • Scumbling: For a hazy effect, lightly drag a dry brush over dry paint.
  • Glazing: This involves applying thin, transparent layers of paint to give depth to colors.

3. Layering and Impasto

Oil paint can be layered, which helps in building texture and depth. Impasto is a technique where paint is applied very thickly, often creating a three-dimensional effect on the canvas.

Common Challenges and Solutions

The Fat Over Lean Rule

One common pitfall is the “fat over lean” rule in oil painting. This means that each additional layer of paint should contain more oil than the layer beneath it. This will help prevent cracking as layers dry at different rates.

Drying Times

Working with oil paints can be frustrating due to the long drying times. To speed up drying, you can use fast-drying mediums like alkyd oil, which will affect the paint’s texture and flow. Experiment to find a balance that works for you.

FAQs About Oil Painting

Q: Can I use regular paintbrushes for oil painting?

A: While you can use regular brushes, it’s advisable to use those made specifically for oil painting. These brushes are designed to withstand the thick, oily nature of oil paints.

Q: How do I clean my oil painting brushes?

A: Clean brushes with a combination of mineral spirits or turpentine followed by soap and water. Always rinse thoroughly to avoid residue.

Q: Can I paint with oils without solvents?

A: Yes! There are water-mixable oil paints that you can use, allowing artists to work without traditional solvents.

Q: What are some beginner oil painting projects I can try?

A: Beginners can start with still life setups, landscapes, or simple abstract compositions to allow experimentation with color and texture.

Conclusion

With the right tools, techniques, and a willingness to experiment, oil painting can become a fulfilling hobby or even a professional pursuit. Embrace your creativity, let your imagination flow, and who knows? Perhaps you’ll be the next master of oil painting!

For more in-depth techniques and guidance, refer to the full resource available at Britannica.

Happy Painting!


Which is the Best Surface for Oil Paints? Discover the Top Choices for Your Masterpiece!

When it comes to oil painting, choosing the right surface is crucial for achieving the desired artistic effect. So, which is the best surface for oil paints? The answer varies depending on your painting style, budget, and personal preferences. Here’s a comprehensive guide that explores the different options available for oil painting surfaces, highlighting their pros and cons to help you find the perfect foundation for your artwork.

Understanding Oil Painting Surfaces

Oil paints adhere well to various surfaces, including canvas, wood panels, and paper. The choice of surface affects not just the final look but also how the paint interacts with the medium. Common surfaces used for oil painting include:

  1. Canvas (stretched and primed)
  2. Wood panels
  3. MDF (medium density fiberboard)
  4. Paper
  5. Canvas boards
  6. Metal
  7. Glass and plastic

Each of these surfaces offers a unique texture and feel, making them suitable for different painting styles and Techniques.

Pros and Cons of Popular Oil Painting Surfaces

Surface Type Pros Cons
Canvas Lightweight, flexible, widely available Can warp over time, may require priming
Wood Panels Rigid, less prone to warping, absorbs less paint Heavier, typically more expensive
MDF Affordable, smooth surface, doesn’t warp More absorbent, may require sealing before use
Paper Convenient, budget-friendly, portable Less durable, can buckle with heavy paint applications
Canvas Boards Convenient, affordable, easy to store May lack the flexibility of stretched canvas
Metal Unique texture, durable, enhances certain styles Requires special preparation, can be costly
Glass/Plastic Extremely smooth, great for specific techniques Requires careful handling, can be slippery

Popular Options: Exploring Each Surface Type

1. Canvas

Canvas is perhaps the most popular surface for oil painters. Both cotton and linen canvases are available, with linen often preferred for its durability and texture.

  • Cotton Canvas: Generally more affordable and readily available, making it ideal for beginners.
  • Linen Canvas: A high-quality option that’s more durable and has a finer texture, preferred by professional artists.

Prep Tip: Always ensure your canvas is properly primed to prevent oil from seeping into the fibers, which can lead to deterioration over time.

2. Wood Panels

Wood panels offer a rigid surface that can handle heavy layers of paint. They are particularly favored for detailed work.

Advantages:

  • Less warping compared to canvas.
  • Suitable for both traditional oil painting and mixed media.

Preparation: It’s important to sand and seal your wooden surface with a primer suitable for oils to prevent absorption.

3. MDF (Medium Density Fiberboard)

MDF provides an affordable and smooth surface for painting.

Usage:

  • Good for beginners who want to experiment.
  • Supports a range of techniques due to its smooth texture.

Caution: MDF can absorb moisture, so always seal it before applying paint.

4. Paper

Specially designed oil painting paper is an emerging option that offers portability and convenience, especially for studies and quick sketches.

Benefits:

  • Lightweight and cost-effective.
  • Available in various textures.

Limitation: Not as durable as other surfaces; heavy applications might cause buckling.

5. Metal

Metal surfaces can create striking artworks with their reflective quality. However, they often require additional preparation.

Surface Preparation:

  • Must be sanded and primed properly to ensure adherence.

Factors to Consider When Choosing an Oil Painting Surface

When selecting the best surface for your oil paintings, consider the following factors:

  • Painting Techniques: Certain techniques may work better with specific textures (e.g., thick impasto works well on canvas, while smooth glazes benefit from wood panels).
  • Budget: Your budget will influence the materials you can purchase. For instance, canvas is typically more affordable than a high-quality wood panel.
  • Portability: If you are a plein air painter, lightweight options like canvas boards or paper may be preferable.
  • Durability: Consider how long you want your artwork to last; wood panels can offer longevity compared to paper.

FAQs About Oil Painting Surfaces

Q1: Can I paint oil on any surface?
A1: While oil paints adhere to various surfaces, not every surface is recommended. It’s best to use primed materials specifically designed for oil paint.

Q2: What is the best budget option for beginners?
A2: Cotton canvas or oil painting paper is a great choice for beginners due to their affordability and accessibility.

Q3: How do I prepare my surface for oil painting?
A3: Ensure the surface is clean and dry. Use a primer (for wood and canvas) to prevent oil absorption, and let it dry before beginning your painting.

Q4: Is there a preferred surface for detailed work?
A4: Wood panels are often preferred for detailed work because of their rigidity and smooth texture.

Q5: How does the surface affect drying time?
A5: The drying time can be influenced by the surface type, with absorbent surfaces like paper slowing down the drying process compared to less absorbent ones like primed canvas.

Conclusion

Choosing the best surface for oil paints is essential for achieving the desired outcome in your artwork. As you delve deeper into the world of oil painting, consider experimenting with various surfaces to discover what resonates with your artistic style. Each option offers unique possibilities that can enhance your creative expression. For more information on oil painting surfaces, visit ArtWeb.

The Iconic World of Oil Painting: Discover the Masterpieces by Famous Oil Painters

Oil paintings are revered throughout the art world for their unique textures, vibrant colors, and impressive Techniques employed by the famous painters throughout history. Some of the most renowned artworks ever created have been realized in oil paint, inviting admiration and study from generations of art lovers. This article delves into the realm of oil painting – exploring famous oil painters, their signature techniques, and notable masterpieces that have shaped art history.

1. Notable Oil Painters and Their Masterpieces

Leonardo da Vinci

  • Mona Lisa
    • Year Painted: 1503–1504
    • Medium: Oil on Poplar Panel
    • Dimensions: 77 cm × 53 cm
    • Current Location: Louvre, Paris

Leonardo da Vinci is an iconic figure of the Renaissance and arguably the most influential painter in Western history. His most famous work, the "Mona Lisa," is celebrated for its captivating subject and innovative techniques.

Vincent van Gogh

  • The Starry Night
    • Year Painted: 1889
    • Medium: Oil on Canvas
    • Dimensions: 73.7 cm × 92.1 cm
    • Current Location: Museum of Modern Art, New York

Vincent van Gogh’s "The Starry Night" is another famous oil painting, renowned for its swirling skies and vibrant colors, depicting the view from his asylum room in Saint-Rémy-de-Provence, France.

claude monet

  • Impression, Sunrise
    • Year Painted: 1872
    • Medium: Oil on Canvas
    • Dimensions: 48 cm × 63 cm
    • Current Location: Musée Marmottan Monet, Paris

Monet, the founder of Impressionism, captured fleeting moments of light and color in his landscapes. His painting "Impression, Sunrise" is credited with giving the Impressionist movement its name.

Pablo Picasso

  • Les Demoiselles d’Avignon
    • Year Painted: 1907
    • Medium: Oil on Canvas
    • Dimensions: 243.9 cm × 233.7 cm
    • Current Location: Museum of Modern Art, New York

Pablo Picasso is one of the most famous artists of the 20th century. His radical approach in "Les Demoiselles d’Avignon" paved the way for Cubism, breaking traditional aesthetics and redefining modern art.

2. Key Characteristics of Oil Painting

Oil painting involves the use of pigments mixed with oils, typically linseed oil. This technique allows for:

  • Rich Color Depth: The translucent quality of oil paint permits greater depth of color through layering.
  • Versatility: Oil paint can be applied thinly (glazing) for a luminous effect or thickly (impasto) for texture.
  • Long Drying Times: The extended drying time allows artists to work at their own pace, blend colors seamlessly, and correct mistakes.
Characteristic Description
Color Depth Translucent layering for rich colors
Versatility Glazing and impasto techniques available
Drying Time Allows for blending and corrections

3. Prominent oil painting techniques

3.1 Glazing

A technique involving the application of thin, transparent layers of paint that can create luminous effects and enhance the depth of colors.

3.2 Impasto

This method involves applying thick layers of paint, allowing for texture and three-dimensional quality on the canvas.

3.3 Scumbling

A technique where a layer of opaque or semi-opaque paint is applied over a dried layer, allowing the underpainting to show through.

4. Famous Works of Art and Their Impact

Here’s a list of some of the most famous oil paintings, their creators, and their significance in the art world.

Painting Artist Year Significance
The Last Supper Leonardo da Vinci 1495 Masterpiece of perspective and composition
The Girl with a Pearl Earring Johannes Vermeer 1665 Celebrated for light, texture, and emotion
American Gothic Grant Wood 1930 Iconic representation of rural American life
The Persistence of Memory Salvador Dalí 1931 Surrealist interpretation of time and consciousness
The Kiss Gustav Klimt 1907 Showcases harmony and intimacy through pattern

5. Understanding Famous Artists and Their Contributions

5.1 Early Masters

Artists like Jan van Eyck and Titian were among the first to master oil painting techniques, laying foundational principles for future generations.

5.2 The Renaissance and Baroque Periods

Artists such as Caravaggio and Rembrandt changed the course of oil painting through their dramatic use of light and shadow, leading to the development of tenebrism.

5.3 Modern Movements

Movements such as Impressionism and Expressionism revolutionized oil painting with innovative approaches to color, form, and abstraction.

FAQs About Famous Oil Painters

Q1: Why is oil painting so popular?
A1: Oil painting allows for deeper exploration of color and texture, which leads to striking and versatile artworks.

Q2: Who are some other famous oil painters?
A2: Other notable oil painters include Jackson Pollock, Edvard Munch, and Georgia O’Keeffe.

Q3: What are the best-known techniques used in oil painting?
A3: The best-known techniques include glazing, impasto, and scumbling, each providing unique visual effects.

Q4: Where can I see famous oil paintings?
A4: Many famous oil paintings are displayed in prestigious museums, such as The Louvre, Museum of Modern Art, and The National Gallery.

For more information about historical oil paintings and their creators, check out Art Ignition for an exhaustive exploration of this art form.

Exit mobile version